
Getting started
This guide takes a facility from "CCTV recording" to "identifying members on the People timeline". It assumes your CCTV / VSaaS module is already up and running — an Edge Processor online, cameras added, footage recording.
Step 1: Enable the feature
AI Insights & People is a facility feature layered on the CCTV module. It's enabled per facility by your Performance Hub account manager:
- People — the core feature: people timeline, profiles, member matching, reports, access zones, and the
insights_*MCP tools. - AI Insights — the enhanced-analysis layer used by background processing such as Self Learning correlation and heatmap pre-generation.
Once enabled, AI Insights & People appears in your Performance Hub sidebar and the Access Zones, People, Face Recognition, and Insights groups appear in the shared Settings sidebar. If a People API is called for a facility without the feature, it returns "People feature is not enabled for this facility" — see Troubleshooting.
Step 2: Turn on People Tracking per camera
Person detection is opt-in per camera. In the CCTV module, open each camera's settings and enable People Tracking (see Cameras & devices).
Choose deliberately:
- Enable it on entrances, reception, and key zones — anywhere you want attendance, identification, or access-zone coverage.
- Skip it where people intelligence adds nothing (car parks, plant rooms) — every AI-analysed feed consumes appliance inference capacity. As a rule of thumb, an appliance handles roughly half as many camera feeds with AI inference as it does for recording alone; see The hardware for per-model numbers.
- Privacy-sensitive areas (bathrooms, change rooms) should never have cameras at all — see Security & privacy.
Step 3: Turn on Enhanced AI Analysis
In Settings → General (a CCTV-owned setting), enable Enhanced AI Analysis:
"Generates richer metadata including heatmaps, path tracking, and self learning. Disabling this will also turn off automatic profile matching. Increases storage usage."
This is what unlocks Self Learning — with it off, the Self Learning settings section is hidden and the correlation pipeline doesn't run. Basic face matching still works without it, but for a facility adopting this module you almost always want it on.
Step 4: Connect your member sync
Member matching needs members to match against. Performance Hub's Partner integration syncs from your member management system:
- Member records — name, membership status, plans, tags, and profile photo.
- Check-ins — swipe/entry events, which power visit-assisted matching and Self Learning.
Synced photos are automatically quality-checked before being used for recognition (sharpness, lighting, pose, occlusion — plus a content check that rejects non-person images like pets or cartoons). Photos that fail show an "Invalid Photo" badge in the People list, and you can filter by Photo Status ("Valid Photo", "Invalid Photo", "Not Processed") to find them. A member with an invalid photo can't be face-matched — but Self Learning can still identify them by visit correlation.
You control which optional contact fields sync (email, mobile phone, address) in Settings → People → Profile Info.
No member management system? You can still add people manually ("Add people") or bulk "Import Members" from a file — see People & profiles.
Step 5: Watch the first identifications
Within a day of running you should see:
- The Timeline populating — open AI Insights & People → Timeline. Identified members appear by name; new visitors appear as "Unsure - ". See People timeline.
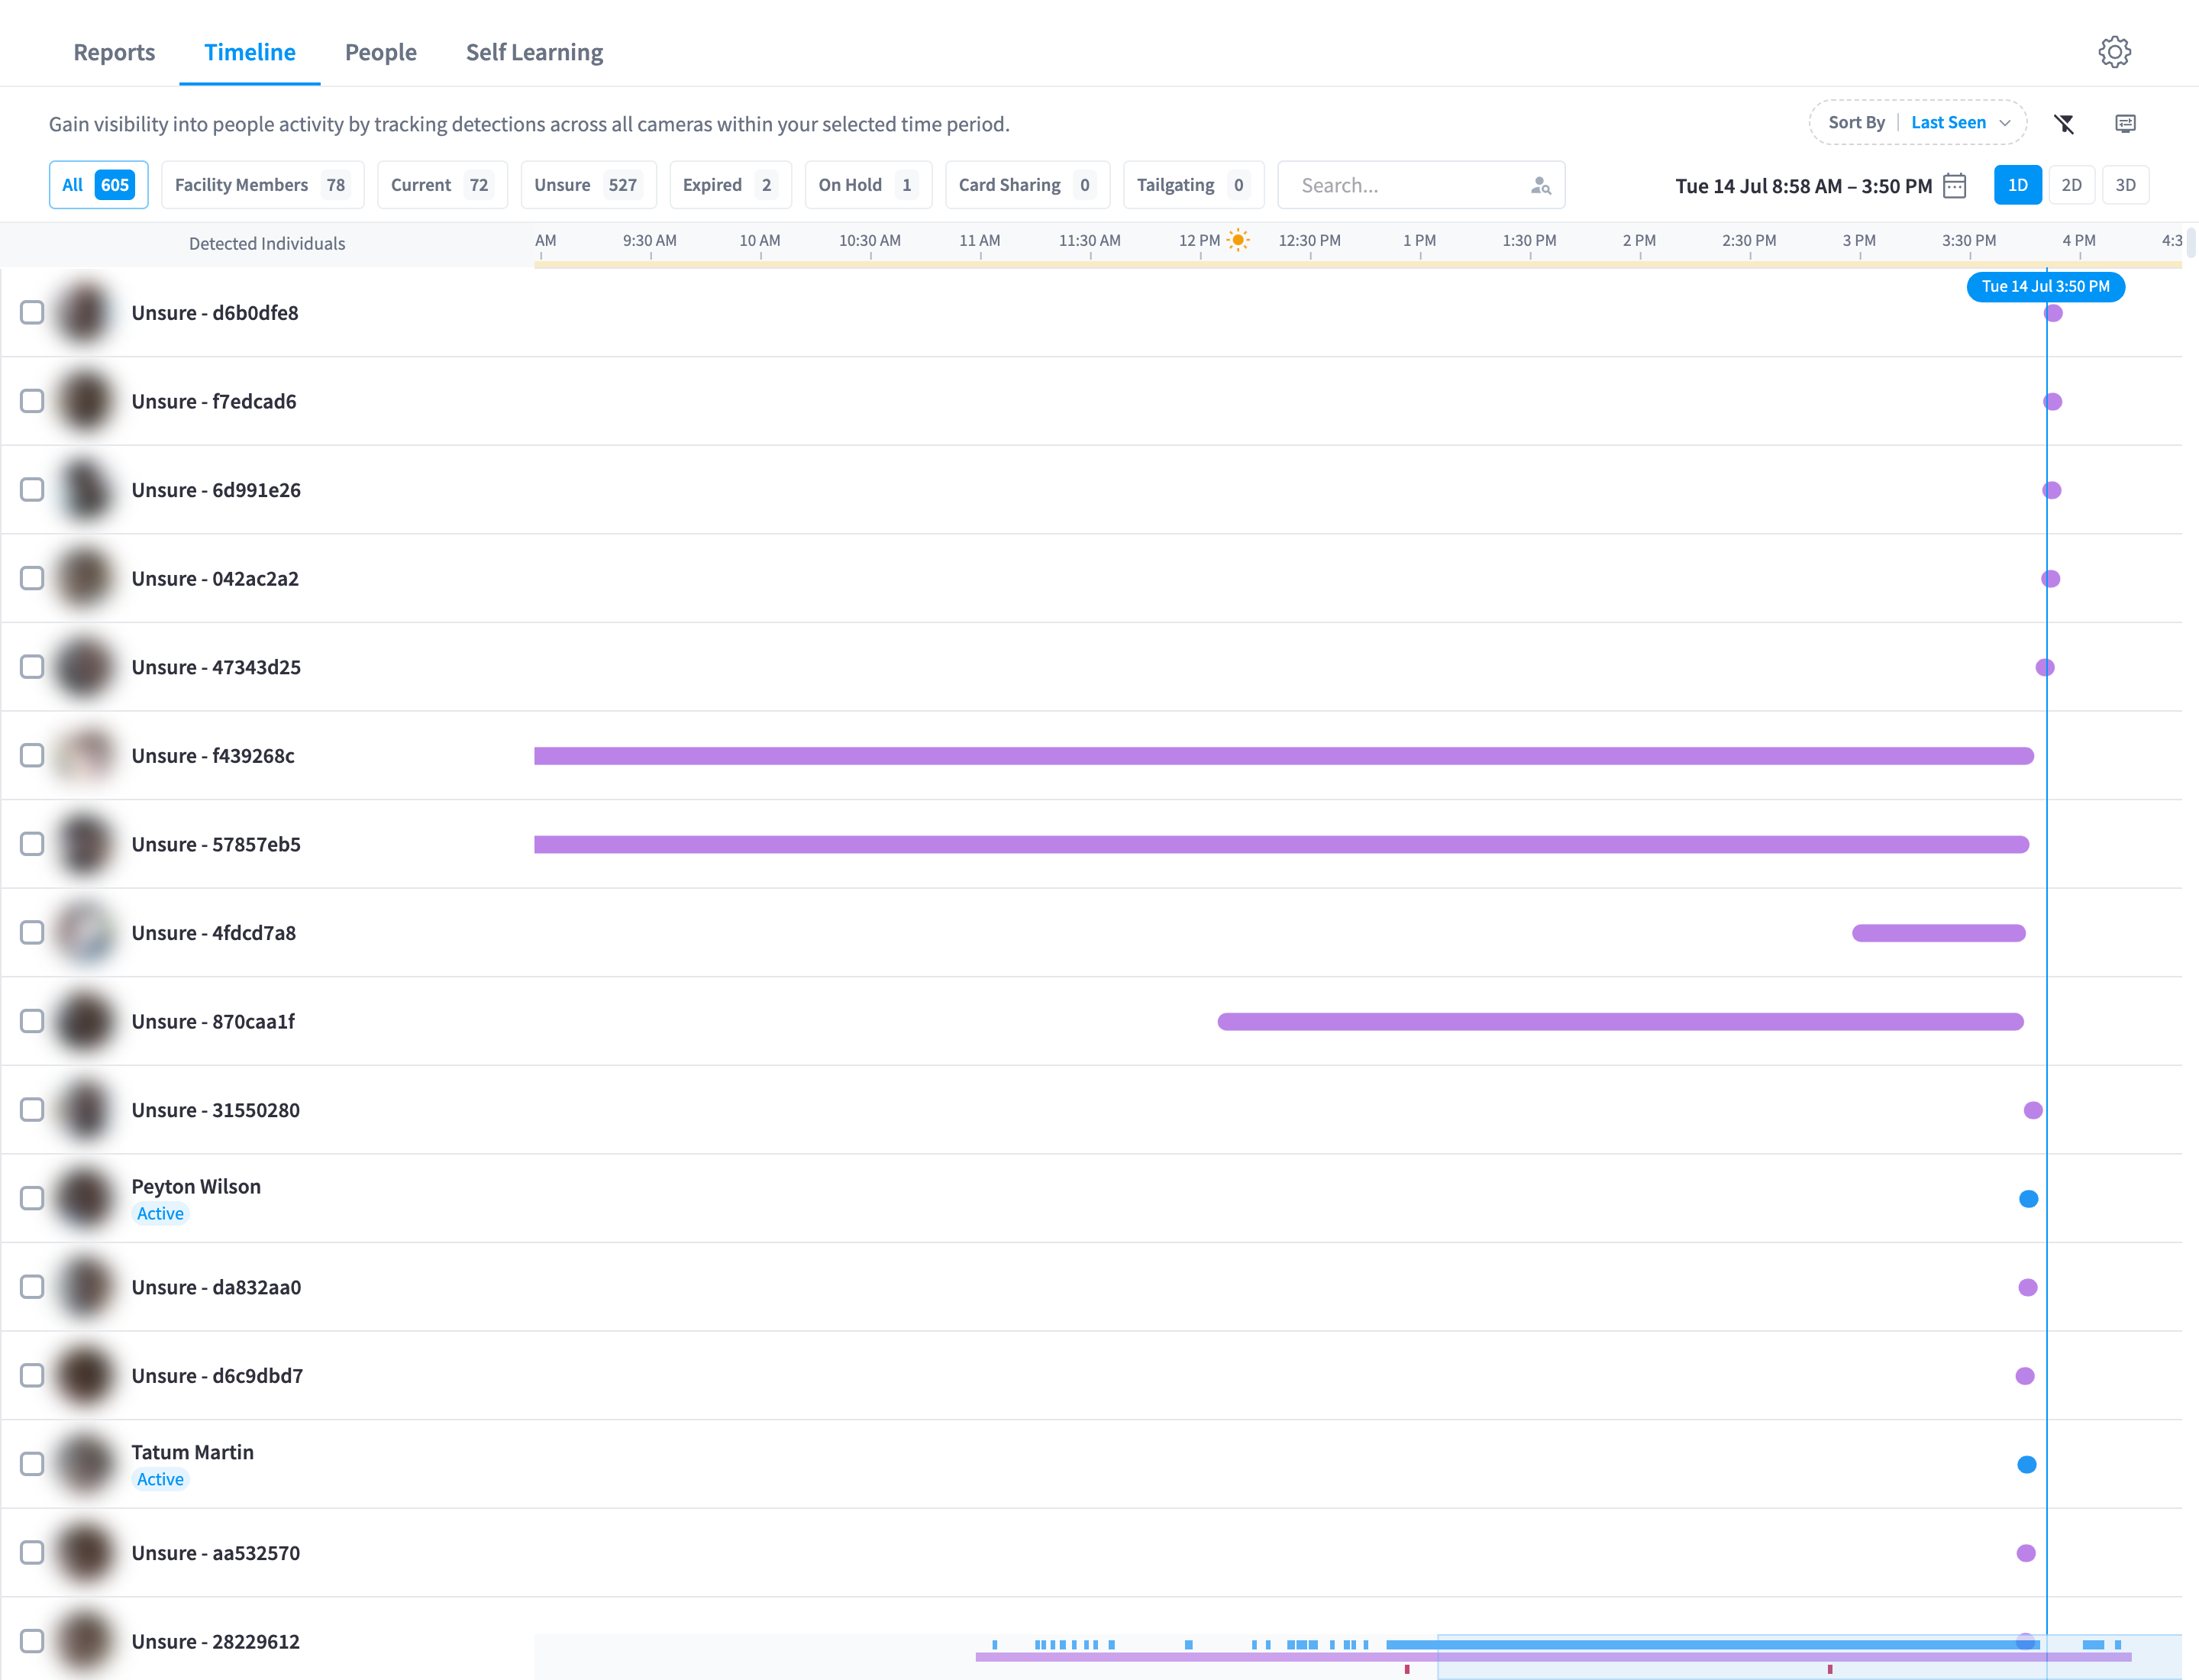
Figure 1: The People timeline on day one — a mix of identified members and "Unsure" visitors
-
Person profiles filling in — click any person to see their activity log, visit patterns, and AI insights. See People & profiles.
-
Reports appearing from the next day — report snapshots are generated overnight for the previous day, so the Reports view starts showing data after the first full day.
Step 6: First-week tune-up
A few things worth doing once real data flows:
| Task | Where | Why |
|---|---|---|
| Blacklist false positives | Timeline → person menu → "Add to Blacklist" | Posters, mannequins, and screens can be detected as faces every day — blacklisting drops them permanently. See Blacklist |
| Merge duplicate unsure profiles | Timeline → select tiles → "Merge" | Early on, one visitor can end up with two shadow profiles; merging teaches the system they're the same person |
| Identify regulars manually | Person menu → "Identify This Person" | Fast-tracks recognition for people with missing/poor member photos |
| Review Self Learning queue | Self Learning tab → "Pending Review" | Approve or reject the automatic member correlations |
| Set up access zones | Settings → Access Zones | Map cameras to zones so Reports and access-violation detection have structure. See Access zones |
| Check retention | Settings → Cloud Storage | AI metadata retention defaults to 24 months — confirm it matches your privacy policy. See Security & privacy |
Leave the recognition thresholds on the Balanced presets for at least a couple of weeks before considering changes — see Face recognition tuning for when and how to adjust.
Next steps
- How it works — understand the pipeline before you tune it.
- People timeline — the day-to-day operational view.
- Integrations & MCP — query people data from your AI Agent.