
Getting Started
From carton to first conversation is a few minutes of work: connect the device, pair it with your facility from the AI Agent module, and say hello. This page walks the whole path.
Setup checklist
Tick items off as you go — your progress is saved in this browser, and you can print the list to take on site.
Step 1 — Connect and power on
- Place the device somewhere ventilated and secure (placement guidance).
- Connect Ethernet before powering on, if you can. If you must use Wi‑Fi, power on first, then join the temporary setup hotspot the device broadcasts (
AI-Agent-<serial>) and follow the captive portal to give it your Wi‑Fi details. - Connect power. The device boots and comes online within a couple of minutes.
If you've connected an HDMI screen, you'll see the status display: the device's network state and its pairing state (waiting to be added to a facility).
Step 2 — Pair with your facility
The fastest way to pair: scan the QR sticker attached to the device with your phone. The sticker encodes the device's unique serial number, and scanning it takes you straight to the device pairing screen in Performance Hub.
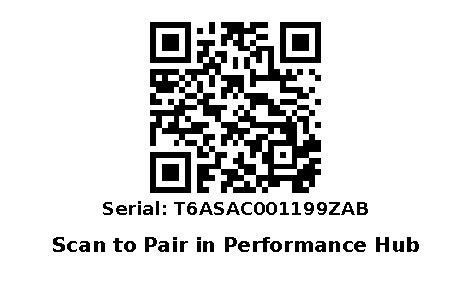
Figure 1: The pairing QR sticker attached to every device — scan it to jump straight to pairing
You can also pair manually: open the AI Agent module in Performance Hub. With no devices yet, you're offered the option to add one; with existing devices, open the device dropdown in the header and choose Add AI Agent Processor.
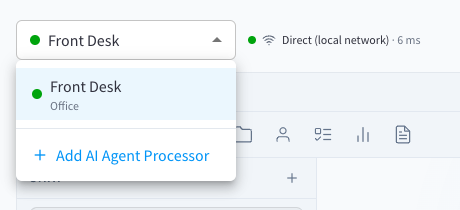
Figure 2: The device dropdown — switch between processors or add a new one
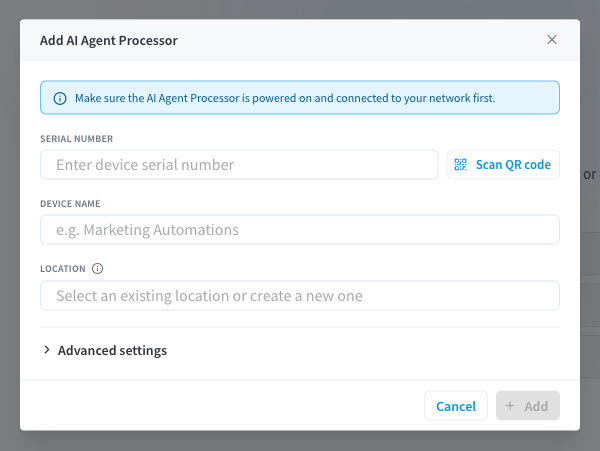
Figure 3: The Add AI Agent Processor dialog
Fill in the dialog:
| Field | Notes |
|---|---|
| Serial number | Pre-filled if you scanned the QR sticker — otherwise type it from the sticker or the label on the bottom/back of the unit |
| Device name | What everyone will see, e.g. Front Desk. Choose something people recognise |
| Device location | Where the unit physically is, e.g. Comms cabinet. Up to 64 characters |
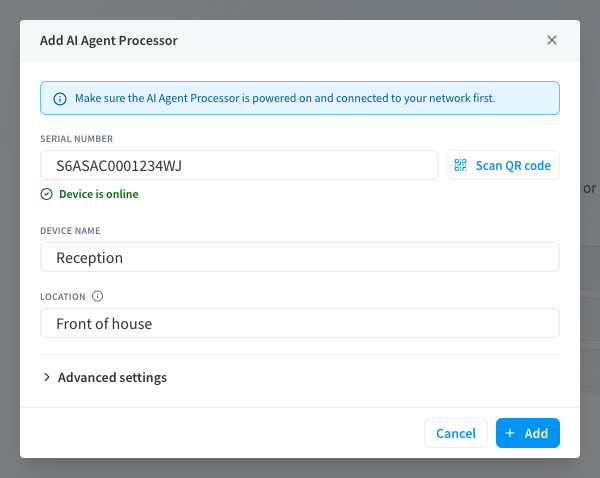
Figure 4: Ready to pair
The dialog checks the device is online as you go — the device must have been heard from within the last few minutes to pair. If the check fails, confirm the device is powered and connected (the HDMI screen shows its network state), give it a minute, and try again. Common messages:
- The serial number does not belong to an AI Agent device — check for typos; the serial is on the QR sticker and the label on the bottom/back of the unit. If the sticker is damaged or lost, the serial printed on the device label is the pairing code — enter it manually.
- The device is already paired elsewhere — a unit can belong to only one facility at a time. Remove it from the old facility first (or use Move to another facility if it's yours).
Click Add device and pairing completes in moments: the device receives its facility identity, credentials, tunnel configuration, and default settings.
Advanced options (optional)
Expanding Advanced options in the dialog lets you deviate from the defaults at pairing time:
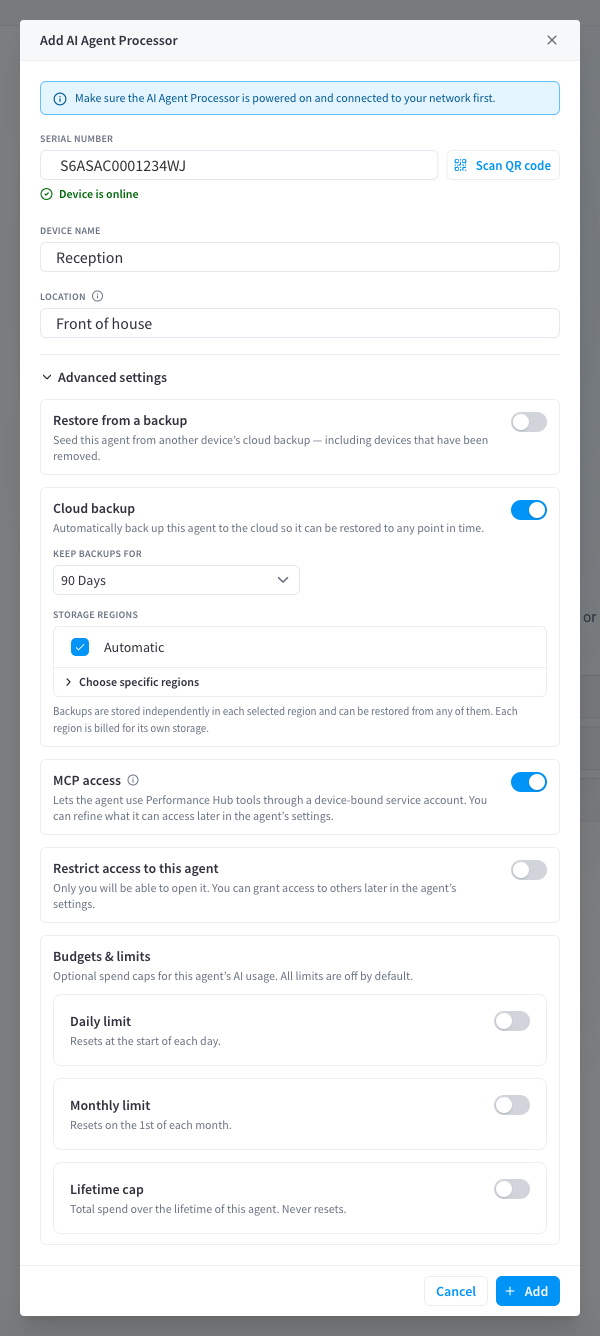
Figure 5: Advanced pairing options
- Cloud backup — on by default with 90-day retention and Automatic region; adjust retention or regions up front if you have data-residency requirements. See Backups.
- Performance Hub access (MCP) — on by default, scoped to this facility. Turn it off here to pair a purely stand-alone agent. See Connecting to Performance Hub.
- Restrict access — off by default (anyone with access to the facility the agent is added under can see and use the agent). Turn it on to start locked down to just you. See Access control.
- Start from a backup — seed the new device from an existing restore point (for example, from a removed device). The agent boots with all of that backup's state. See Restore & recovery.
Everything here can be changed later in the device drawer — the defaults are right for most facilities, so when in doubt, just pair.
Whoever pairs the device becomes its owner for access-control purposes.
Step 3 — Meet your agent
Select the new device in the dropdown (it's selected automatically after pairing) and the agent's interface loads. On a brand-new agent, a short setup wizard — "Set up your AI Agent" — walks you through four quick steps:
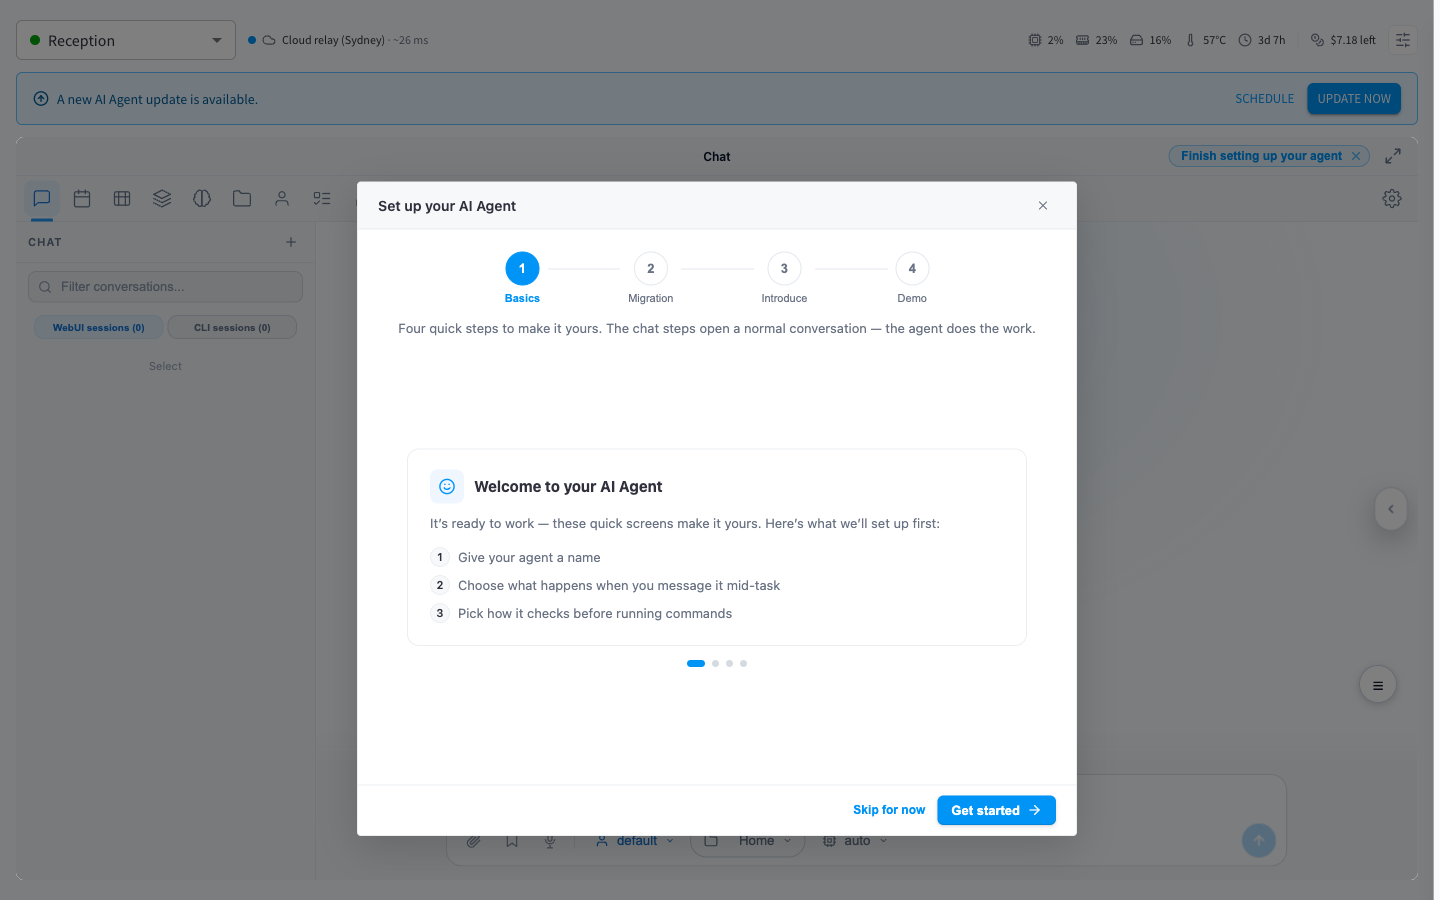
Figure 6: First-run setup — four quick steps to make the agent yours
- Basics — name your agent, and choose how it behaves: what happens when you message it mid-task (steer it immediately, or queue your message as a follow-up) and how it handles command approvals.
- Migration — optionally bring an existing assistant's memory, skills, and chat history across from another computer; skip with "I'm starting fresh, no need to migrate". See Migrating to your agent.
- Introduce — tell the agent your name and role, about your organisation, and what you want help with day to day. Everything goes into its long-term memory and shapes its personality.
- Demo — a two-minute live tour: reading the web, working with files, remembering things across conversations, and scheduling tasks, ending with suggestions tailored to what you told it.
You can Skip for now at any point and finish later — the wizard reappears until it's done, and everything it sets is changeable afterwards in the agent's settings.
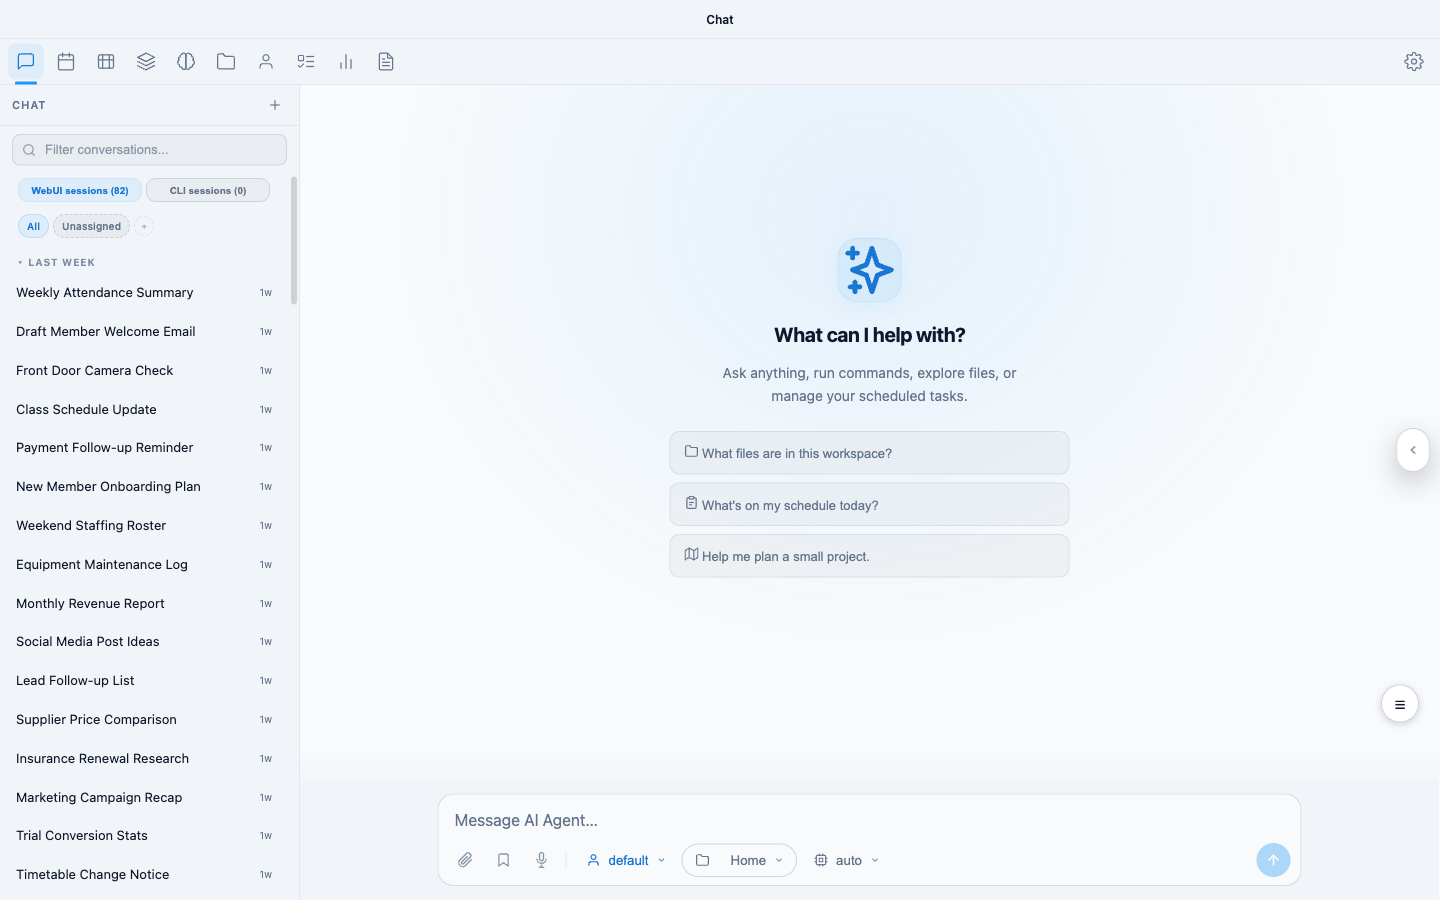
Figure 7: The agent, ready to work
Step 4 — Give it something real to do
Note: What the agent can see in Performance Hub depends on which modules and integrations your facility has connected. Examples that draw on live data — attendance, member insights, and so on — need that data to be flowing into Performance Hub from modules such as AI Insights & People or your other connected systems. If a module isn't connected at your facility, the agent will tell you it can't see that data.
Good first tasks that show what it can do:
- "What can you see in Performance Hub for this facility?" — watch it enumerate its capabilities.
- "Summarise this week's attendance against last week." — live data, first question.
- "Every weekday at 7am, prepare a short morning briefing and notify me." — your first automation with a push notification.
- Drop a spreadsheet or PDF into the conversation and ask for a summary — it lands in the agent's workspace.
Coming from another AI agent platform? The built-in migration skill can carry your old agent's data across — see Migrating to your agent.
What's already taken care of
Because pairing wires everything up, note what you didn't have to do: no AI model API keys (pre-connected with the auto model), no backup setup (hourly, from the first hour), no firewall changes, no software installation. The remaining recommended step is a quick look at Budgets & limits to set a monthly spend cap you're comfortable with.
Related pages
- Using your agent — day-to-day work
- Device management — the drawer, metrics, and updates
- Troubleshooting — pairing problems and fixes