
Timeline & Playback
The Timeline is the investigation surface: one camera at a time, scrubbed across a whole day, with recordings, timelapse imagery, and live video woven into a single view. When you know roughly when something happened, this is where you find it.
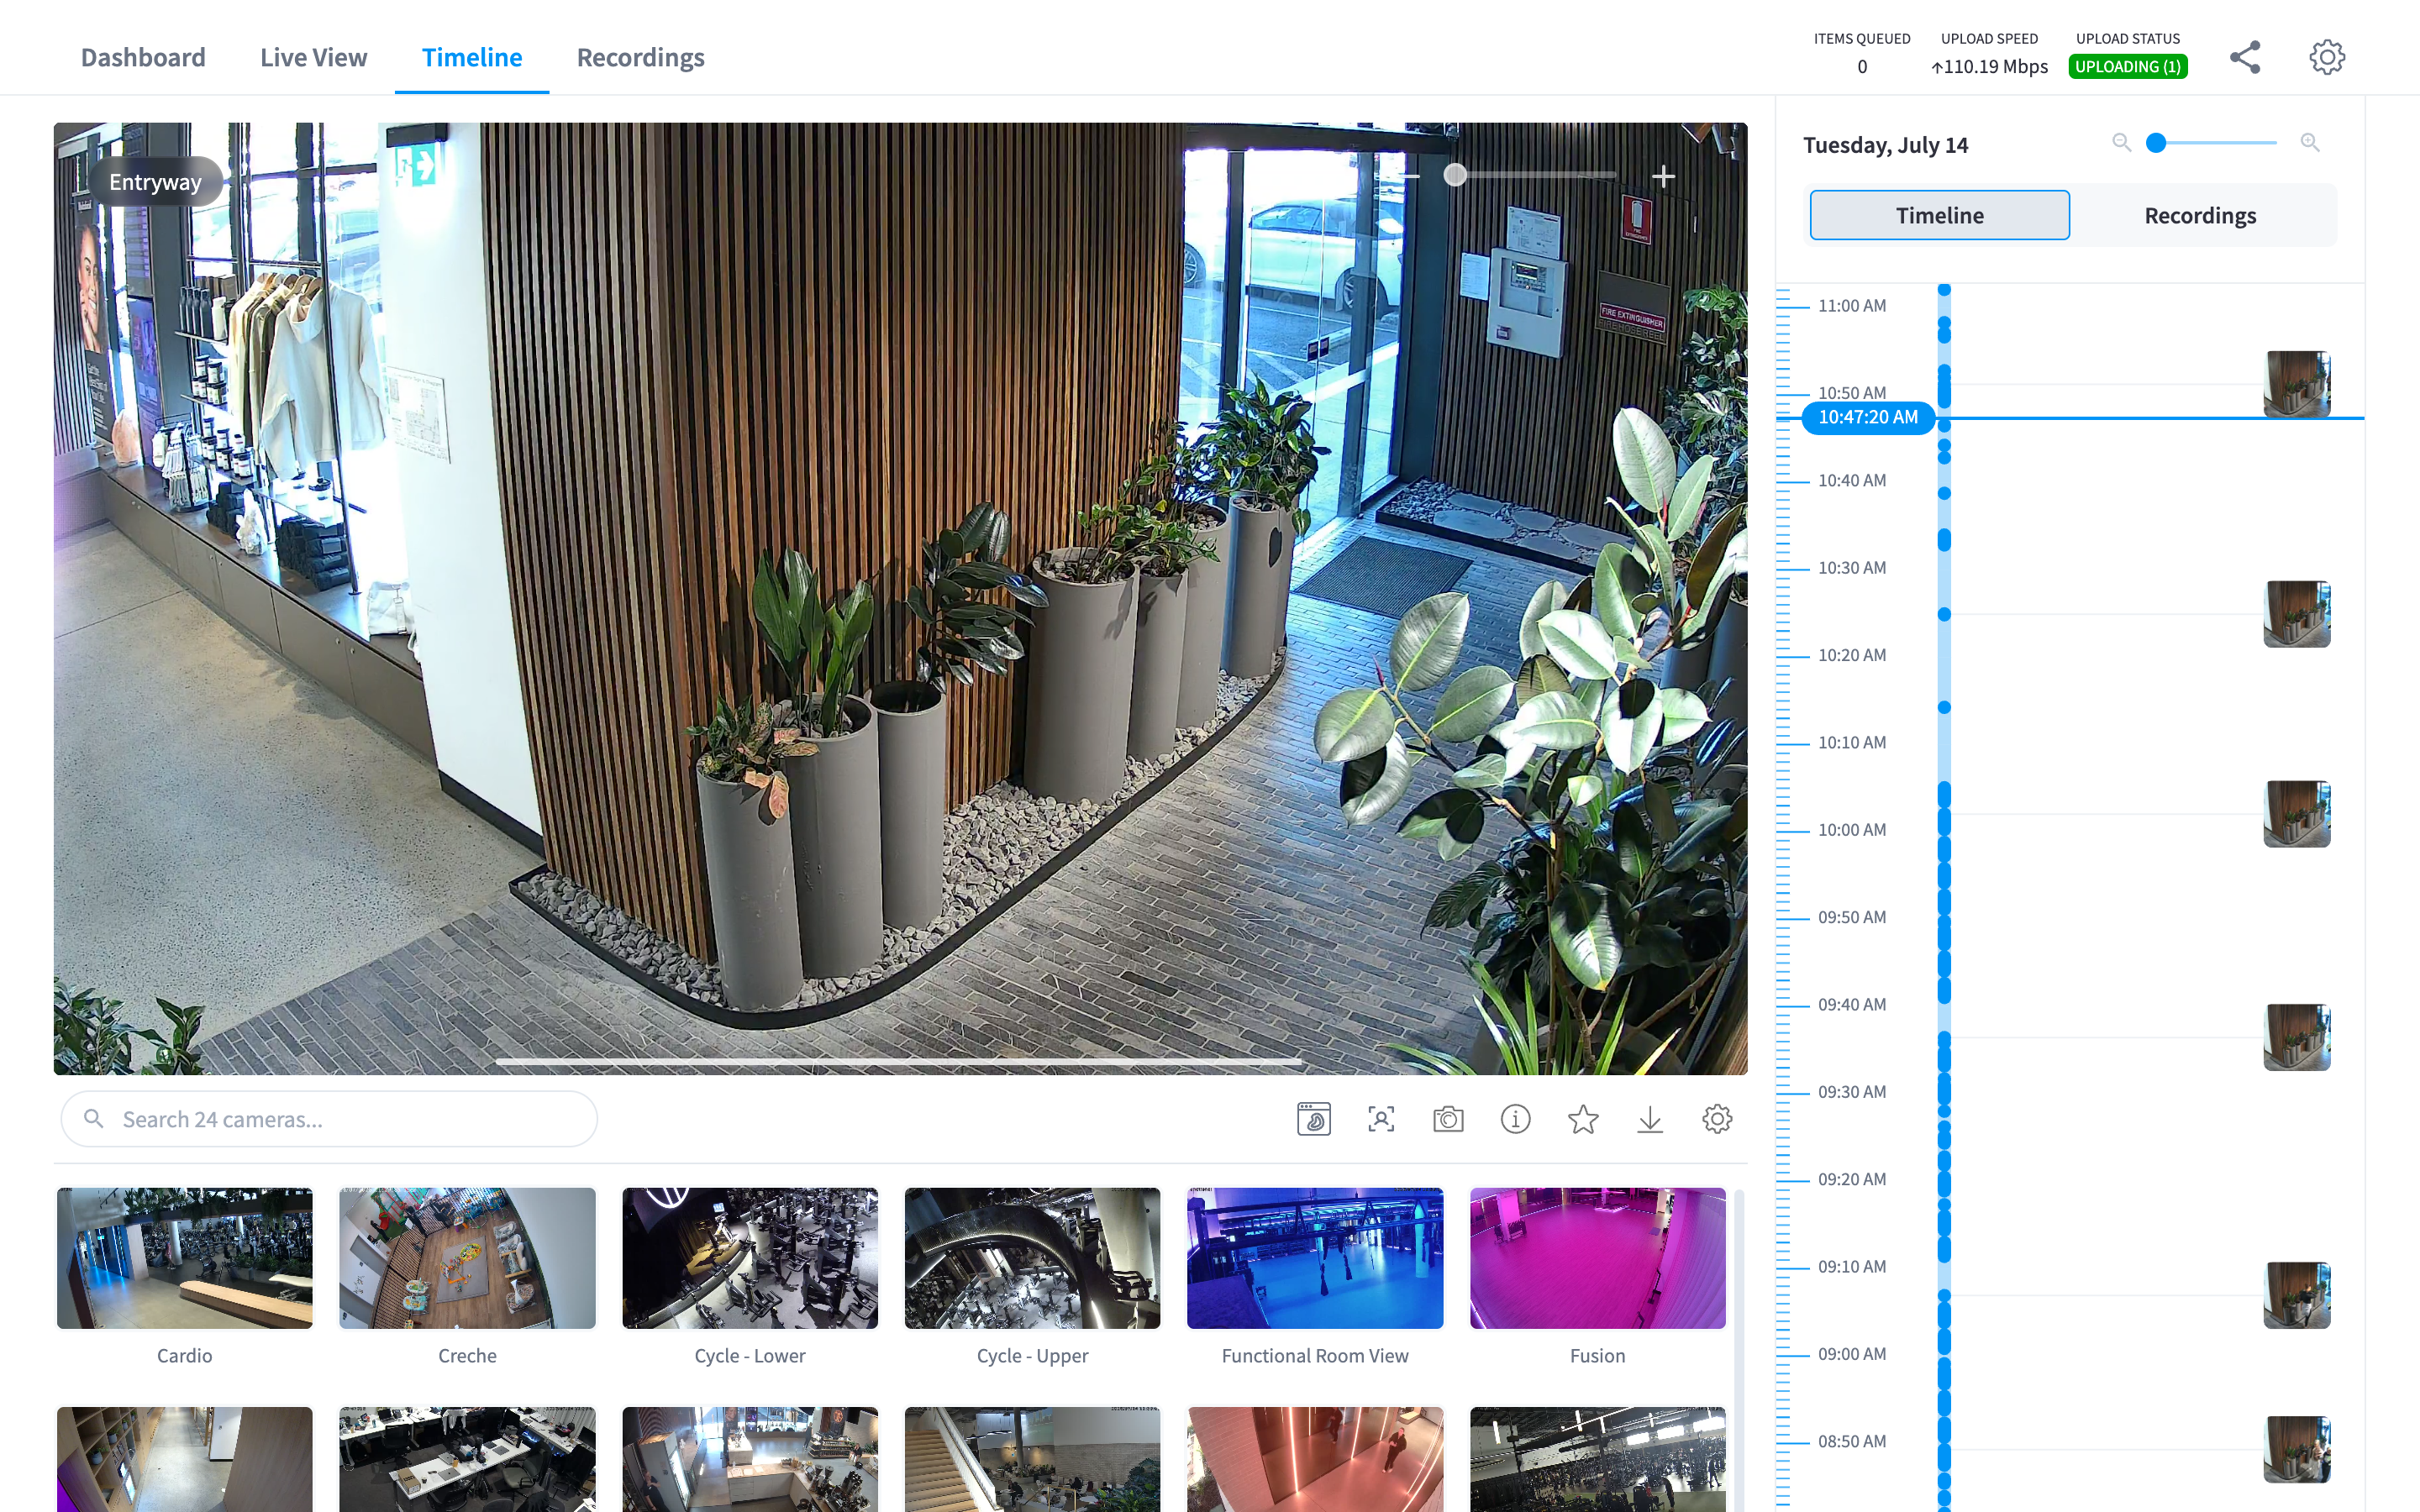
Figure 1: The Timeline — the player, the camera strip below, and the time rail with recordings on the right
The layout
- The player fills the main area with the selected camera at the selected moment.
- The camera strip below shows live thumbnails of every camera — click to switch. Search with the "Search {n} cameras..." box.
- The time rail on the right is the day: a vertical scale with the date at the top, recording markers, and periodic preview thumbnails. Drag it to move through time; the current position is flagged with the exact timestamp.
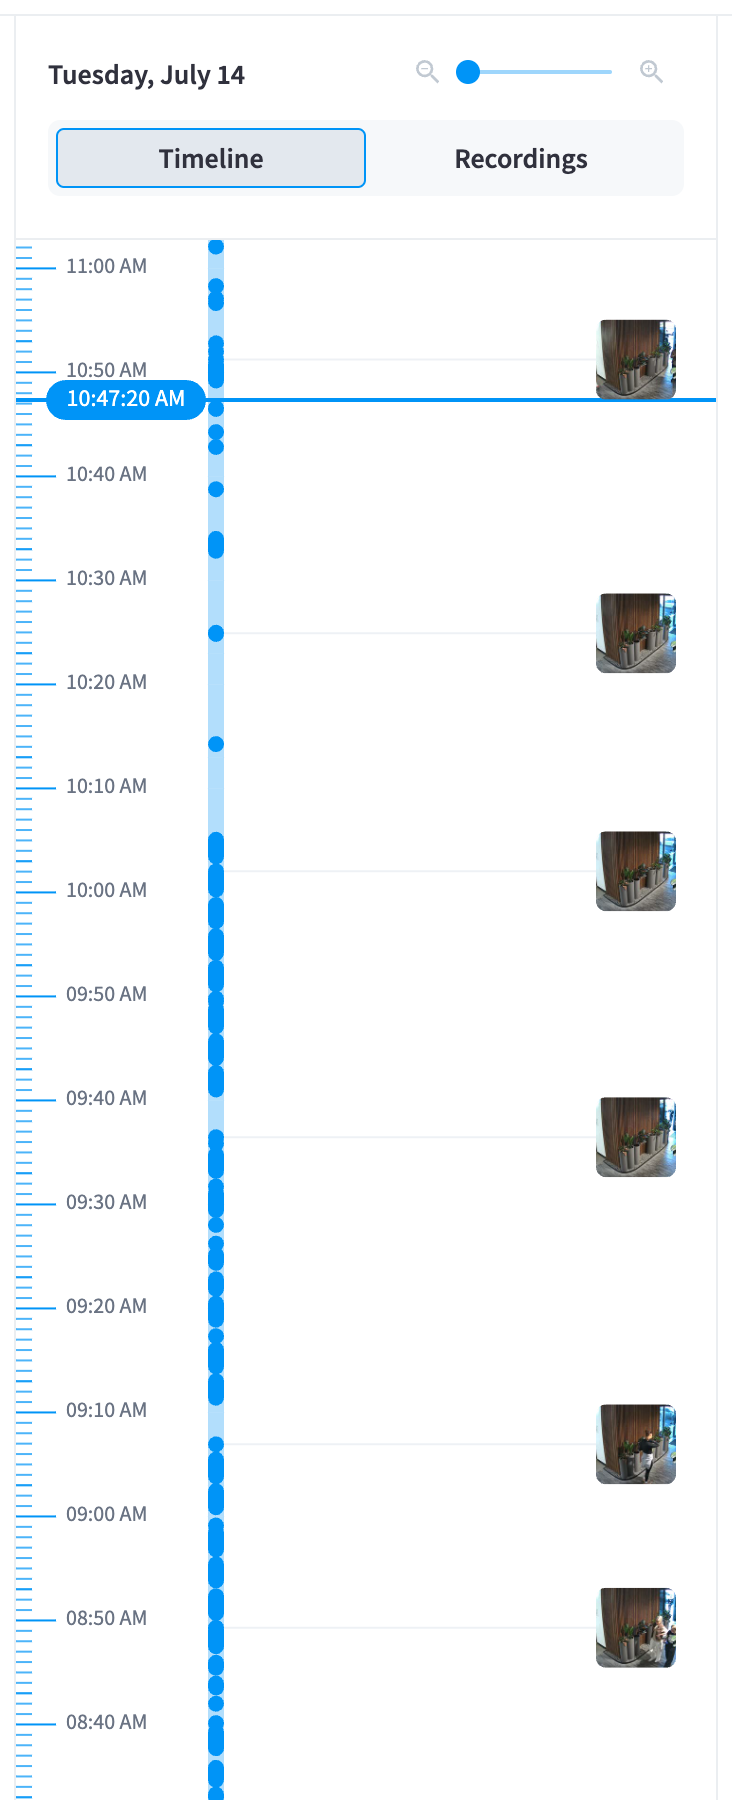
Figure 2: The time rail — the day at a glance, with recordings marked and the playhead timestamped
The rail's magnifier slider zooms the time scale from day-overview down to second-level precision. The rail has two tabs: Timeline (the scale) and Recordings (the same period as a list of clips — click one to jump to it).
Scrubbing and the timelapse filmstrip
Because the Edge Processor captures a timelapse frame from every camera once a minute, the Timeline can show you imagery even where no recording was triggered:
- Drag through time and the player shows the nearest timelapse frame — a minute-by-minute filmstrip of the entire day.
- When you land inside a recording, playback switches to real video, frame-accurate.
- Where nothing exists yet (footage still uploading, or a camera that was offline), the player says so: "Recording queued for upload." or "There is no available timelapse data during this time".
This is what makes finding an unknown moment fast: skim the filmstrip at day scale, spot the change, zoom in, and play the actual recording.
Playback controls
| Control | Action |
|---|---|
| Play / Pause | Toggle playback (Space) |
| Previous (Older) / Next (Newer) | Jump between recordings |
| Rewind 15 seconds / Forward 15 seconds | Skip within a clip |
| Playback Speed | From slow-motion to fast-forward (default "Normal") |
| Mute / Unmute | For cameras with audio |
| Fullscreen | Take the player fullscreen |
Keyboard shortcuts
| Action | Keys |
|---|---|
| Skip ±1 second | ↑ / ↓ |
| Step one frame back / forward | ← / → |
| Slow down / speed up | J / L |
| Play / pause | Space |
The same shortcuts work in the Recordings video player.
The toolbar under the player

Figure 3: The camera search and the player toolbar
| Tool | Action |
|---|---|
| Take a Snapshot | Save the current frame as an image — handy for reports |
| Show additional info | Metadata about the current recording |
| Retain recording / Unretain recording | Keep the current clip indefinitely — see Retain & archive |
| Download this recording | Save the clip locally |
| Stream Quality | Playback quality for the current stream |
| Device Settings | Jump to the camera's device dialog |
| Show Motion Map / Hide Motion Map | An AI Insights & People overlay showing where motion/people concentrated — documented with that feature |
Live mode
The Timeline can run at the live edge: select a camera and switch to its live stream (View Live Stream) to watch in real time in the same player, then scrub back the moment you need to review something. If the stream can't start, the player explains why (device updating, camera offline) and offers Restart Device where appropriate.
Getting to the Timeline from elsewhere
- The Dashboard's recent recordings and Recording Activity strip link straight into the relevant camera and time.
- The Recordings video player's Go to timeline button jumps to the same moment in context — perfect for "what happened just before this clip".
Related pages
- Recordings — browse and filter clips across all cameras
- Live view — many cameras at once, right now
- Retain & archive — keeping what you find