
AI Models & Access
AI Models, Credits & Usage gives your facility prepaid access to a catalog of leading AI models through a single, OpenAI-compatible endpoint. Your Performance Hub AI Agents connect to it automatically with no setup, and you can provision your own API keys to plug the same models into third-party or in-house software. You top up a USD balance, set spend limits, and watch every request in real time — all from one place.
Quick Reference
Where to find it: Main Menu → Settings / Account → AI Models, Credits & Usage
Who can access: Users with access to the AI Models, Credits & Usage module
Purpose: Buy AI inference on a prepaid balance; manage models, budgets, top-ups, usage analytics, request logs, connected AI Agents, and API keys
How it fits together
- Your facility holds a prepaid balance in USD. You top it up with your stored billing card (manually or automatically), and every AI request draws down the balance at the price of the model that served it.
- The model catalog covers models from many providers. All models are enabled by default; you can turn individual models on or off for your facility, and restrict them further per API key or per agent.
- There are two ways to consume models:
- Connected AI Agents — AI Agent devices paired with your facility connect automatically, with no API key needed.
- Your own API keys — provision keys and point any OpenAI-compatible SDK or tool at the Performance Hub endpoint.
- Spend limits (daily, monthly, and a lifetime hard cap) let you bound spend independently of the balance, across every key and agent — with tighter per-key and per-agent limits available on top.
- Every request is recorded — model, tokens, cost, latency, and status — in the Activity analytics and the Logs tab. Prompt and response content is never stored.
The main areas
The module has four tabs plus a Settings area (cog icon, top right):
| Area | What you do there |
|---|---|
| Overview | The dashboard: available balance, spend today and this month, estimated runway, spend and request charts, reliability at a glance, budget usage, and top agents & keys. |
| Activity | Deep usage analytics with four views (Overview, Trends, Performance, Explore), filters by key/agent and model, and CSV export. |
| Budgets & Limits | Two sub-tabs: Spend Limits (account-wide daily/monthly/lifetime caps and per-agent limits) and Balance & Top-up (manual top-ups, auto top-up, and the transaction history). |
| Logs | The per-request audit trail: every request's model, tokens, cost, speed, and status, with live refresh, search, filters, and a detail drawer. |
| Settings (cog) | Models (enable/disable catalog models, edit the Auto Router), Agent Access & API Keys (connected agents, API keys, and the API connection details), and Guardrails (content protections and custom content filters). |
The Overview dashboard
The Overview tab summarises your account at a glance.

Figure 1: The stat band — Available balance, Spent today, Spent this month, and Estimated runway, with quick-glance chips for auto top-up, spend limits, enabled models, and agents online
- Available balance — the prepaid credit remaining right now.
- Spent today / Spent this month — usage charges in the current day and calendar month (facility local time).
- Estimated runway — "Rough estimate based on average daily spend this month. Top up or enable auto top-up to extend it."
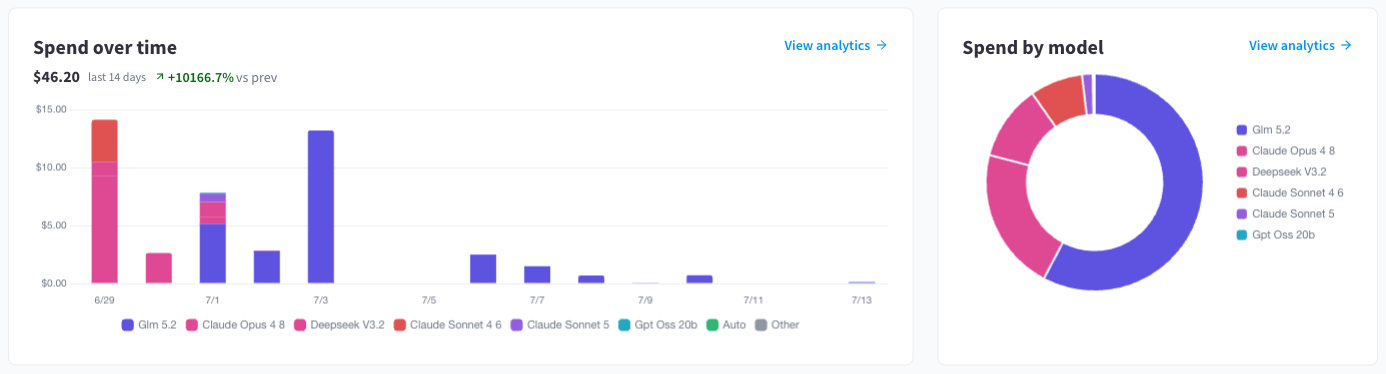
Figure 2: Spend over time (last 14 days, with change vs the previous period) and Spend by model
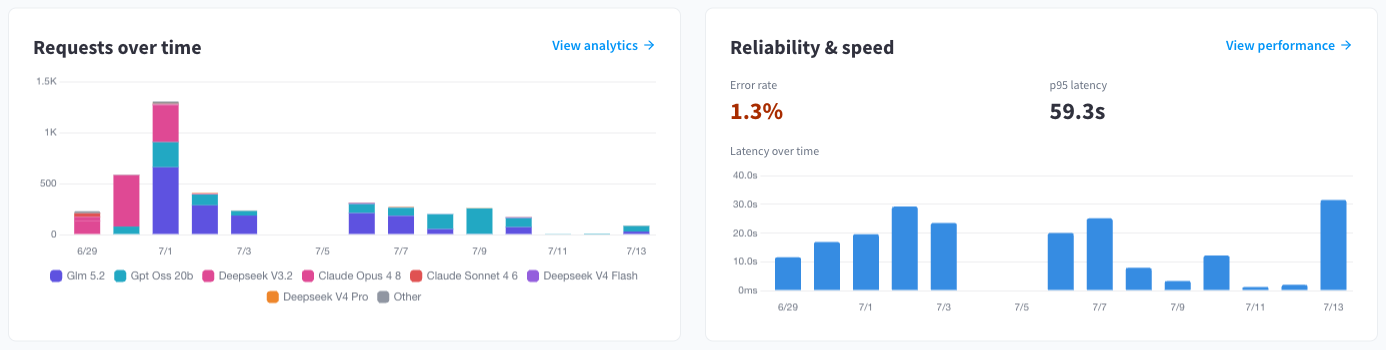
Figure 3: Requests over time by model, and the Reliability & speed card with error rate, p95 latency, and latency over time

Figure 4: Budget usage (your spend limits and how close you are to them) and Top agents & keys ranked by spend
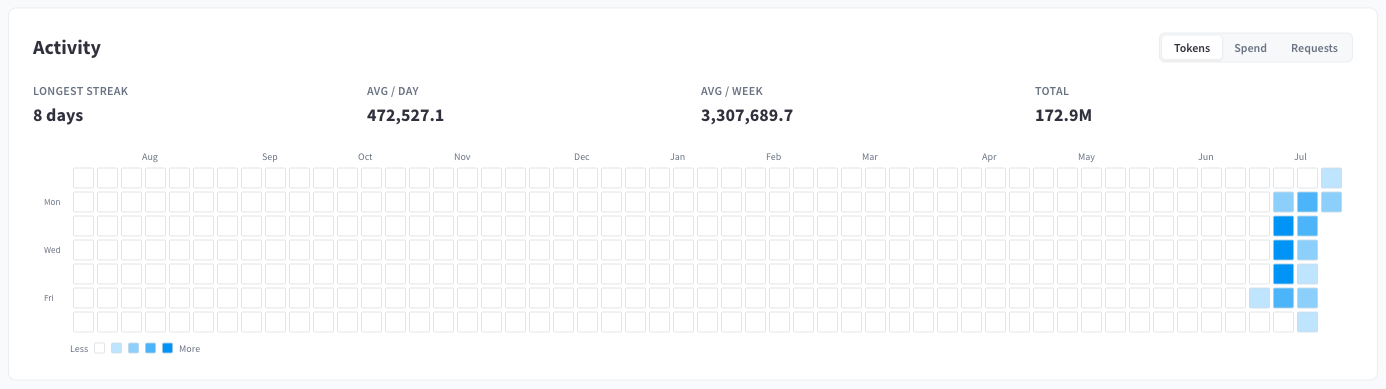
Figure 5: The Activity heatmap — a year of usage at a glance, switchable between Tokens, Spend, and Requests, with longest streak and per-day/per-week averages
Documentation guide
Concepts
- How it works — the conceptual model: prepaid balance vs spend limits, the two access paths, how requests are priced, and the full glossary.
Getting started
- Getting started — enabling the module, your first top-up, and your first request.
- Connecting your application — the quickstart for your own software: base URL, authentication, and curl / Python / TypeScript examples.
Managing access
- Models — the catalog, enabling and disabling models, quick presets, and the Auto Router.
- API keys — creating keys, the one-time secret display, per-key spend caps, rate limits, model restrictions, and the rotate/revoke/delete lifecycle.
- AI Agents — how paired AI Agent devices connect automatically and how to bound each one.
- Guardrails — content protections (PII masking, secret redaction, prompt-injection shield) and custom content filters.
Money & monitoring
- Budgets & top-ups — the balance, manual and auto top-ups, receipts, the transaction history, and account spend limits.
- Activity & logs — the analytics views, CSV export, and the request log.
Reference
- Reference — every setting, default, limit, and error response in one place.
- Troubleshooting — symptom-by-symptom fixes for blocked requests, key issues, and balance questions.
- Common questions — FAQ.
Getting started checklist
Tick items off as you go — your progress is saved in this browser, and you can print the list.
Selecting a facility
The module is configured per facility. Use the facility selector in the main Performance Hub toolbar to choose which facility you are configuring. While the facility context loads, the module shows "Loading facility context…".