Door & Gate Access
Door & Gate Access lets your facility's members and authorised users unlock physical doors and gates with one tap in the Door & Gate Access mobile app, while you control exactly who can open which doors, when, and from where — all from Performance Hub.
Quick Reference
Where to find it: Main Menu → Smart Club Technology → Door/Gate Access
Who can access: Users with Door/Gate Access module access
Prerequisites: The Device Management and CCTV modules must be enabled for your organisation
Purpose: Manage door controllers, decide who can unlock doors (and when and from where), invite users to the mobile app, and audit every unlock attempt
How it fits together
- A door controller is a small hardware device installed at each door or gate. It actuates the lock relay and stays connected to Performance Hub over your network.
- Users sign in to the Door & Gate Access mobile app with a one-time code sent to their phone or email — there is no password and no self-signup. Only people you add (or sync) into User Access can sign in.
- When a user taps Unlock, the server checks their access in real time: their access rules or personal grants, the configured operating hours, and (if enabled) whether they are physically at the facility (geofence). If everything passes, the door opens for a configurable number of seconds.
- Every attempt — successful, denied, or failed — is recorded in the Access Logs for auditing.
The four main areas
The module has three tabs plus a Settings area (cog icon, top right):
| Area | What you do there |
|---|---|
| Doors | See every door at the facility, its online status and analytics, unlock or identify a door remotely, and configure per-door behaviour (location, icon, maintenance mode, hold time, auto-unlock schedule, per-door rule and geofence overrides). |
| User Access | The list of every person who can use the mobile app at this facility. Add users manually, import from CSV, or sync from your member-management integrations and Computer Vision. Manage personal grants, invitations, sessions, and per-user messages. |
| Access Logs | A complete audit trail of unlock attempts: who, which door, when, from where, and the outcome (or the reason it was denied). Export to CSV. |
| Settings | Facility-wide policy: Access Rules (who can unlock and during which hours), Sync settings, Access Scopes (door groupings with their own policies), Geofencing, and App Security & Settings (app lock, support contacts, facility-wide messages). |
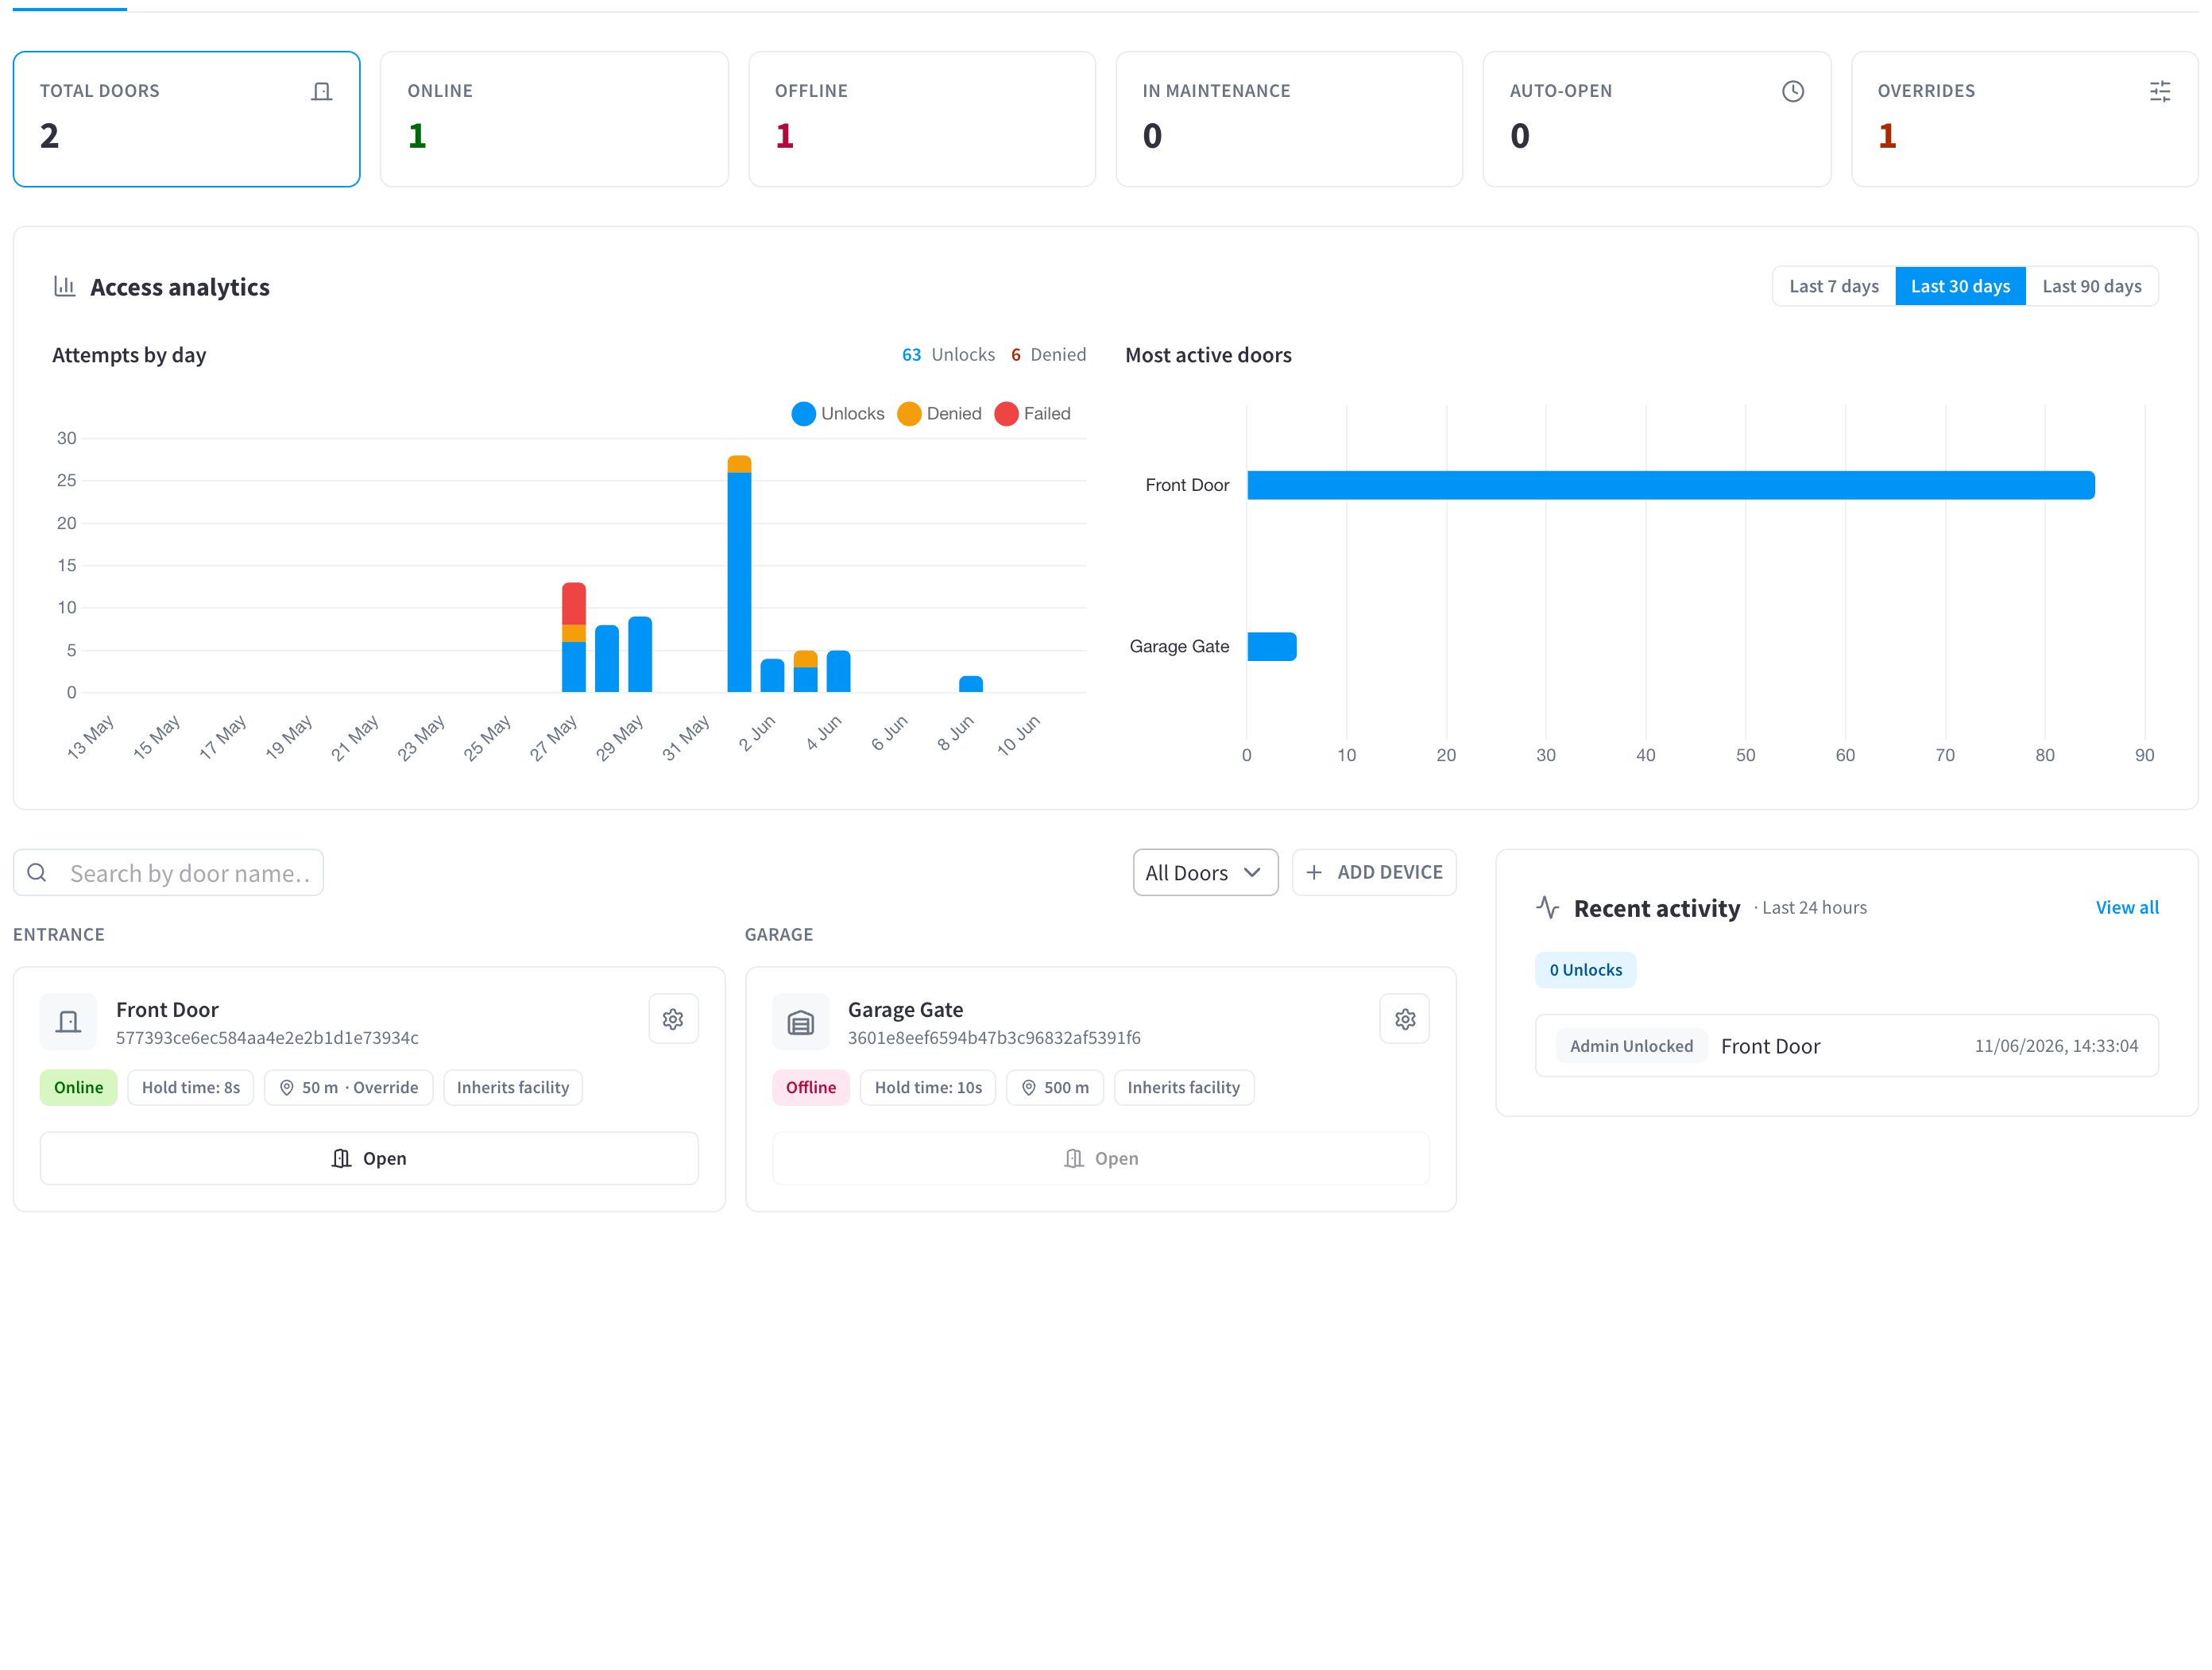
Figure 1: The Doors tab — status counters, access analytics, the door list grouped by location, and the recent activity feed
Documentation guide
Concepts
- How access decisions work — the single most important page. Explains rules vs grants vs scopes, the order checks run in, and the policy hierarchy (facility → scope → door). Includes the full glossary.
Managing doors
- Doors — the Doors tab, door cards, analytics, remote unlock/identify, and every per-door setting.
- Adding doors — pairing a new door controller with your facility.
Managing people
- User Access — the user list, adding users manually, CSV import, the user detail panel, personal grants, and the access kill switch.
- App invitations — emailing users a link to install the app, individually or in bulk, and auto-inviting synced users.
- Sync & integrations — mirroring members from your integrations or Computer Vision into User Access, the sync activity log, and bulk-deleting synced users.
Access policy
- Access Rules — facility-wide rules: person-type rules, tag-based access, and operating hours.
- Access Scopes — bundle doors so you can grant them in one tick or give a subset of doors different rules, hours, or geofence.
- Geofencing — require users to be physically at the facility before they can unlock, test the geofence, and set per-door exceptions.
Mobile app experience
- App messaging — facility-wide banners, per-user messages, and automated message rules (e.g. expired-membership notices).
- App security & settings — enforce Face ID/Touch ID/passcode before the app can be used, and control when support contacts appear in the app.
- The mobile app (for members) — what your members see: signing in, unlocking, and common messages.
Auditing & reference
- Access Logs — reading the audit trail, event states, the event detail view, and CSV export.
- Reference — every event state, denial reason, setting, default, and limit in one place.
- Troubleshooting — symptom-by-symptom fixes for offline doors, denied unlocks, sync issues, and invitation problems.
- Common questions — FAQ.
Getting started checklist
Tick items off as you go — your progress is saved in this browser, and you can print the list.
Selecting a facility
Door & Gate Access is configured per facility. Use the facility selector in the main Performance Hub toolbar to choose which facility you are configuring. If no facility is selected, the module shows "Select a facility in the main toolbar to configure Door/Gate Access."
Saving changes in Settings
All Settings pages share a save bar. When you have unsaved changes, a bar appears with Discard and Save changes. If you try to navigate away with unsaved changes, you are asked to confirm: "Discard unsaved changes? You have unsaved changes that will be lost if you leave this page."