Live View
The Live View tab shows the real-time status of every display screen at your facility. Each screen is represented as a tile showing its current state, connection status, and assigned round station. Use this to quickly identify which screens are online, which are off, and to manage individual devices.
Toolbar

| Element | Description |
|---|---|
| Add New Screen + | Register a new display screen to the facility |
| Device Management | Access device configuration and management settings |
| Display Message | Send a message to all displays |
| Search Device | Search for a specific screen by name |
| Only show devices online in the past 24 hours | Toggle to filter out long-offline devices from the grid |
Screen tiles
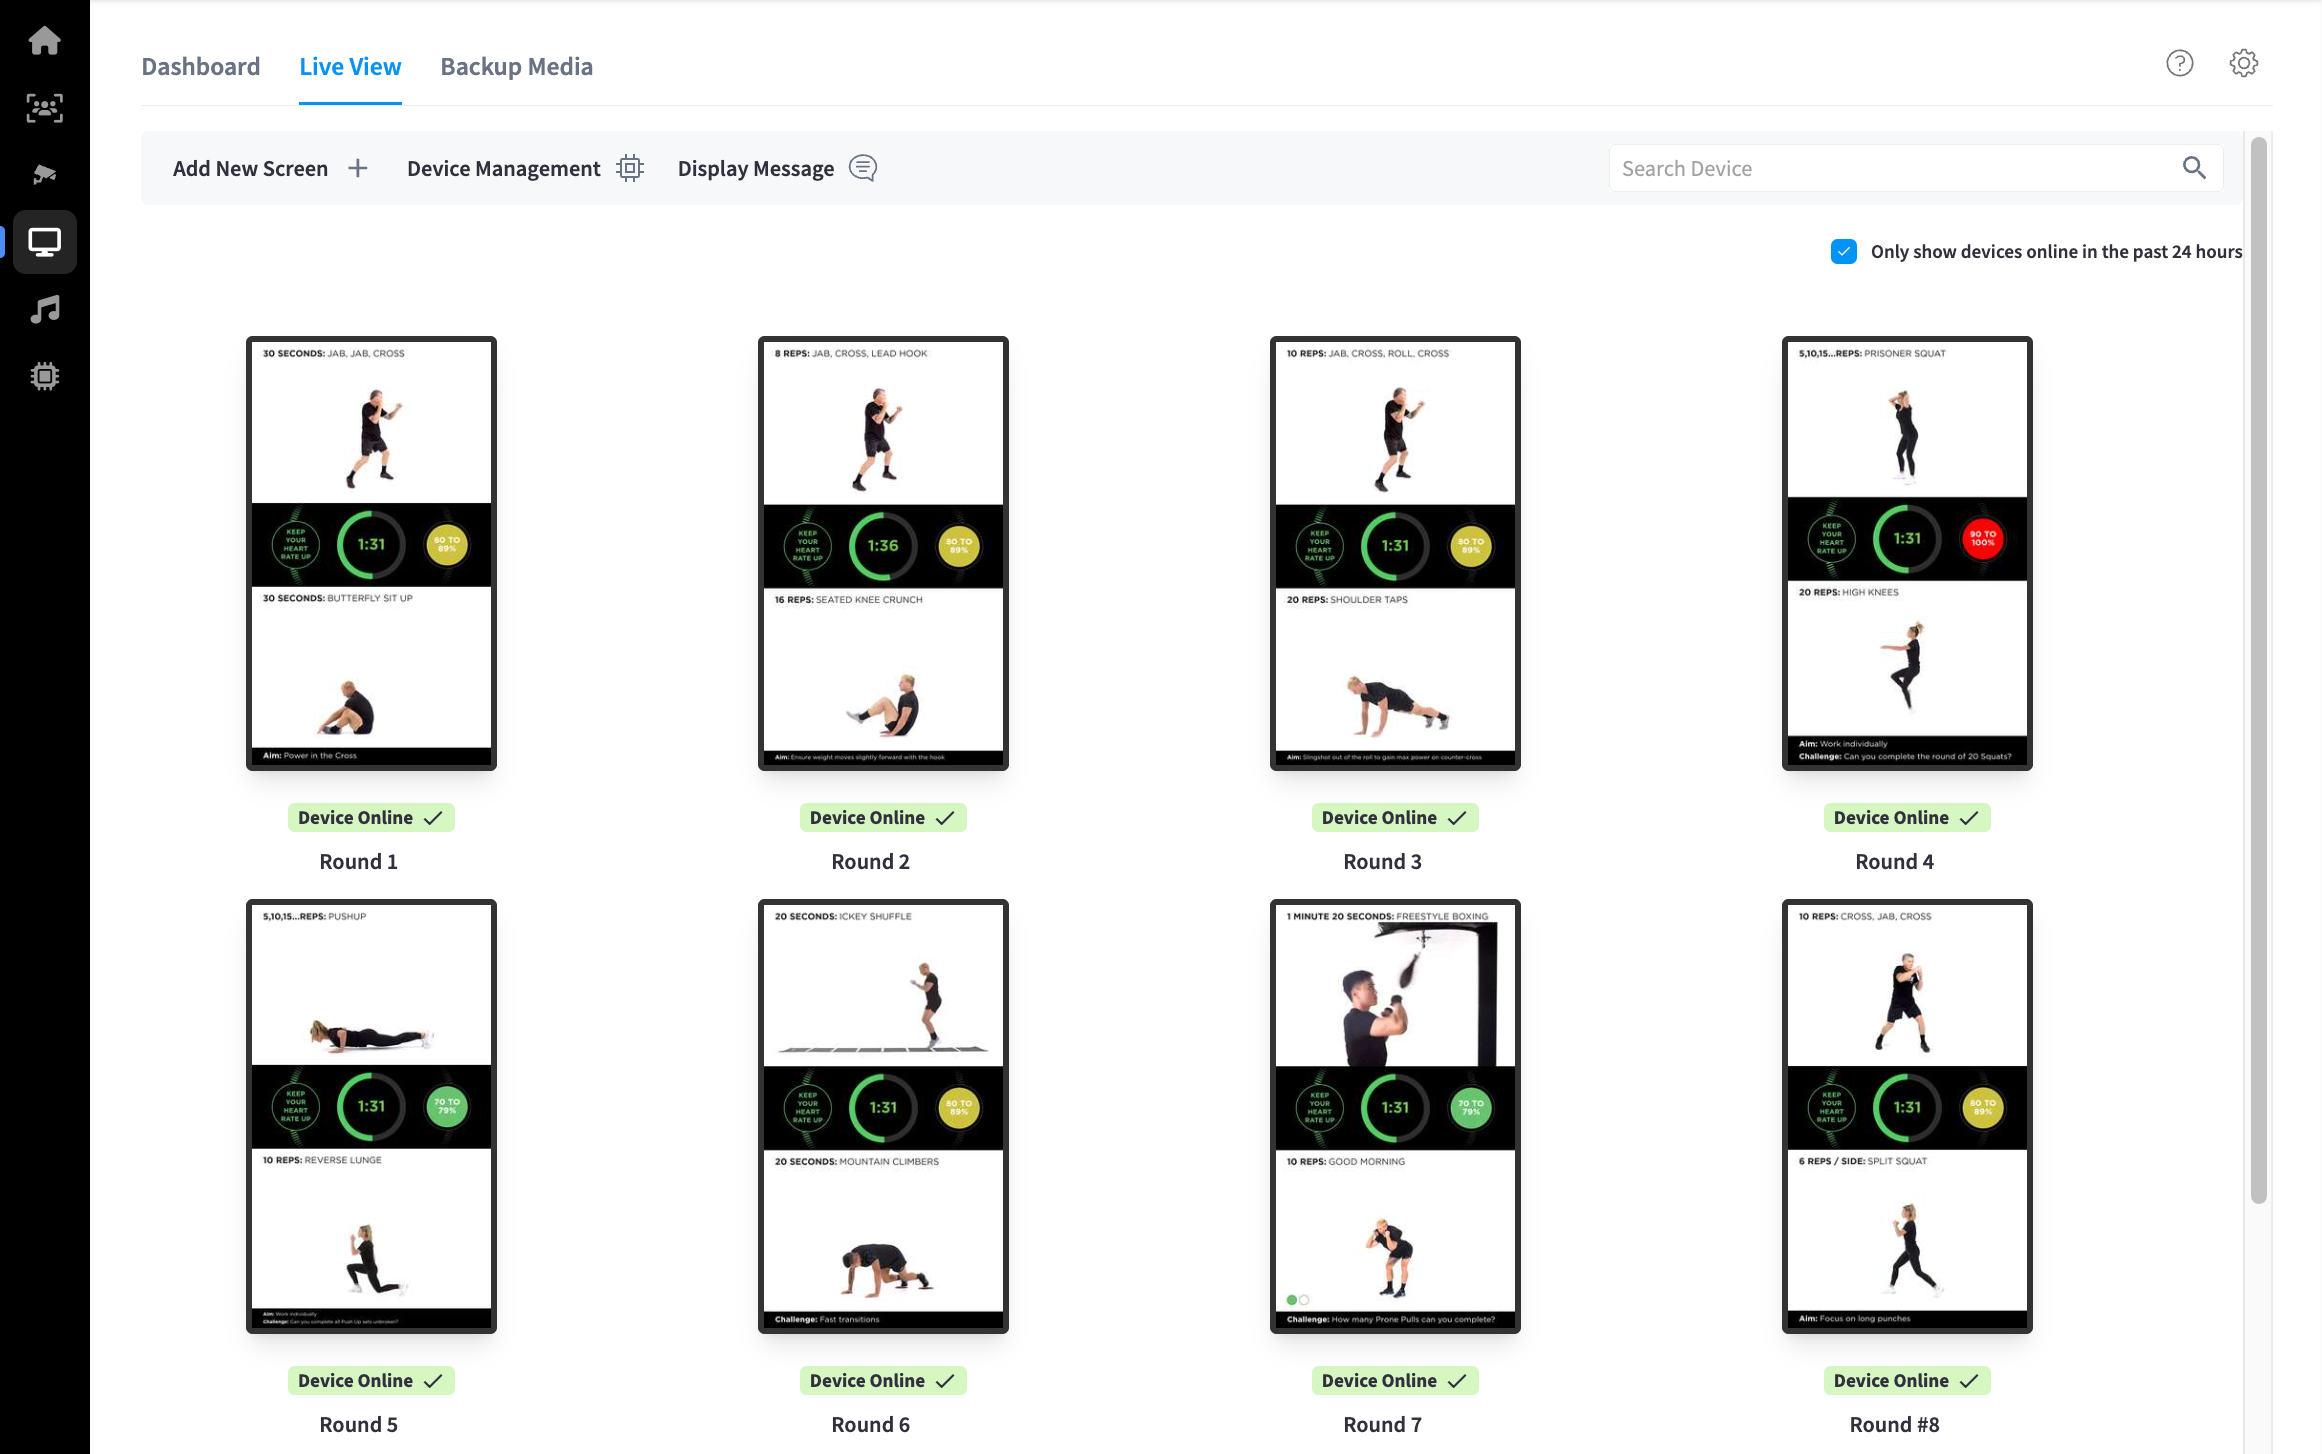
Each connected display appears as a tile in the grid, showing:
| Element | Description |
|---|---|
| Screen preview | A live thumbnail of what the screen is currently displaying, or a SCREEN IS OFF message if the display is powered down |
| Round label | The round station this screen is assigned to (e.g. Round 1, Round 5) |
| Device Online ✓ | Green badge confirming the device is connected and online |
| Screen name | The label assigned to the screen (e.g. Round 1, Round #8) |
Screens are arranged in a scrollable grid ordered by round number. Larchmont has 12 screens (Round 1 through Round 12), all visible in two rows of four.
Note: A SCREEN IS OFF state means the display is powered down but the underlying device is still online. This is normal outside of class hours.
Screen detail
Click any screen tile to open the device detail panel. This shows the full status and configuration for that individual display screen.
If a device is offline, a banner is shown at the top: Device is currently Offline. Data displayed reflects the last known state recorded before the device went offline and updates automatically when it reconnects.
The panel contains three tabs:
Details
| Field | Description |
|---|---|
| Device UUID | Unique identifier for the device (copyable) |
| Public IP | The device's external-facing IP address (copyable) |
| Local/LAN IP | The device's IP address on the local network (copyable) |
| Connection | Network connection type (Ethernet or WiFi). For WiFi, shows SSID, security type, channel, frequency, and router manufacturer |
| Device Serial Number | Hardware serial number of the mini PC (copyable) |
| Device model | Hardware model of the mini PC (e.g. Asus MINIPC PN41-S1) |
| CPU | Current CPU temperature and usage percentage |
| Activity Down/Up | Total data transferred since last reboot |
| Uptime | How long the device has been running since last restart |
| Last seen | Connection status — shows Online when active, or time since last connection |
| Pairing ID | Short identifier used to pair the device (copyable) |
| Connected Display | Manufacturer, model name, and current output resolution of the connected TV/monitor |
| Display Serial Number | Serial number of the connected display (copyable) |
| Display Audio Support | Audio format and channel count supported by the connected display |
| Software Information | App build number, release date, balenaOS version, and Supervisor version running on the device |
The Details tab also includes Turn Display OFF and Turn Display ON buttons to power cycle the connected screen without leaving the panel.
Configuration
| Setting | Description |
|---|---|
| Device Name | The display name shown on screen tiles and in reports |
| Equipment Associated | Links this screen to a specific round station (e.g. #2 - Boxing 2) |
| Display Orientation | Screen rotation — Normal, Rotate 90° Left, Rotate 90° Right, or Inverted (Upside Down) |
| Screen Resolution | Output resolution — Automatic, 1920×1080, 1280×720, or 720×400 |
| Scheduled Reboot | Automatic reboot frequency — Disabled, Daily, Weekly, or Monthly |
| Prevent from becoming Master Clock | Stops this device acting as the Sonos timing master |
| Disable audio output on this device | Mutes all audio output from this screen's device |
| Prevent from becoming Sonos Controller | Stops this device controlling the Sonos system |
| Base Display Brightness | Brightness level for the connected display (0–100) |
| Underscan | Adjusts the display underscan to remove black borders (0–100) |
Click Save Changes to apply any configuration edits.
Advanced
Troubleshooting
| Option | Description |
|---|---|
| Remotely Reboot Device | Sends a reboot command to the device |
| Manage WiFi Networks | View and configure WiFi networks available to the device |
| Unlock Updates on Device | Enables software updates to be applied to the device |
| Debug On / Debug Off | Toggles debug mode for diagnostics and issue investigation |
| Capture Screenshot | Takes a screenshot of what the device is currently displaying |
| Load Remote URL | Loads a custom URL on the display |
| Identify Display | Flashes the screen to confirm which physical display corresponds to this device |
Move Device
| Option | Description |
|---|---|
| Move Device to other Facility | Transfers this screen's registration to a different facility |
Note: If a device is no longer in use, select Request to Remove Device from Account in the detail panel to submit a removal request.
Compliance details
The Compliance Details button is available at the bottom of the device detail panel (any tab). It opens a separate panel showing the regulatory and certification information for the device hardware, including:
- Device model and serial reference
- FCC ID and NCA approval number
- Regulatory certification marks (FCC, CE, and others)
- RF exposure and interference compliance statements
- Links to the manufacturer's regulatory certification documents and device manual
This information is relevant for regulatory audits or if you need to verify that installed hardware meets compliance requirements for your region.
Related pages
- Display Screens — dashboard, program loading, and display control
- Backup Media — offline fallback for screens without network access
- Settings — display power, brightness, and volume configuration