User Access
The User Access tab lists every person who can (or could) use the mobile app to unlock doors at this facility. This page covers the list itself, adding users manually, bulk CSV import, and everything in the user detail panel — grants, the access kill switch, app activity, sessions, and deleting users.

Figure 1: The User Access tab
Where users come from
Each row has a source that tells you how it was created:
| Source | Badge | How rows appear | Who maintains the data |
|---|---|---|---|
| Manually added | Manual | An admin clicked Add user or used Import (CSV) | Admins |
| External Integration | Integration (or the partner's name) | Synced automatically from a member-management integration | The sync — synced fields are overwritten on every pass |
| CCTV/Computer Vision | CCTV/Computer Vision | Synced from identified people in the CCTV module | The sync |
Sync is off by default; enable it under Settings → Sync settings — see Sync & Integrations.
A row needs at least a mobile phone or an email address — that's what the person uses to sign in to the mobile app with a one-time code.
Stats and filters

Figure 2: The stat tiles — All users, Has access, No access
Click All users, Has access, or No access to filter the list by current access outcome. (Selecting a tile also resets the Source filter.)

Figure 3: Search, Import/Add user buttons, and the filter chips
- Search — matches name, phone, or email.
- Filter chips:
| Chip | Options |
|---|---|
| Source | All sources, Manually added, External Integration, CCTV/Computer Vision |
| Access | Any status, Has access, No access, Disabled, Without grants |
| Membership status | Any membership + the statuses present in your data |
| Person type | Any type + the types present in your data |
| Tag | Any tag + the tags present in your data |
| Invitation | Any invitation, Invited, Not invited, Send failed |
| App adoption | Any adoption, Active (has used the app), Not yet active |
- Sort by — Name (default), Recently added, Recently updated, Last used, Last synced; with an ascending/descending toggle.
- Clear filters appears whenever a search or filter is active.
Reading a user row
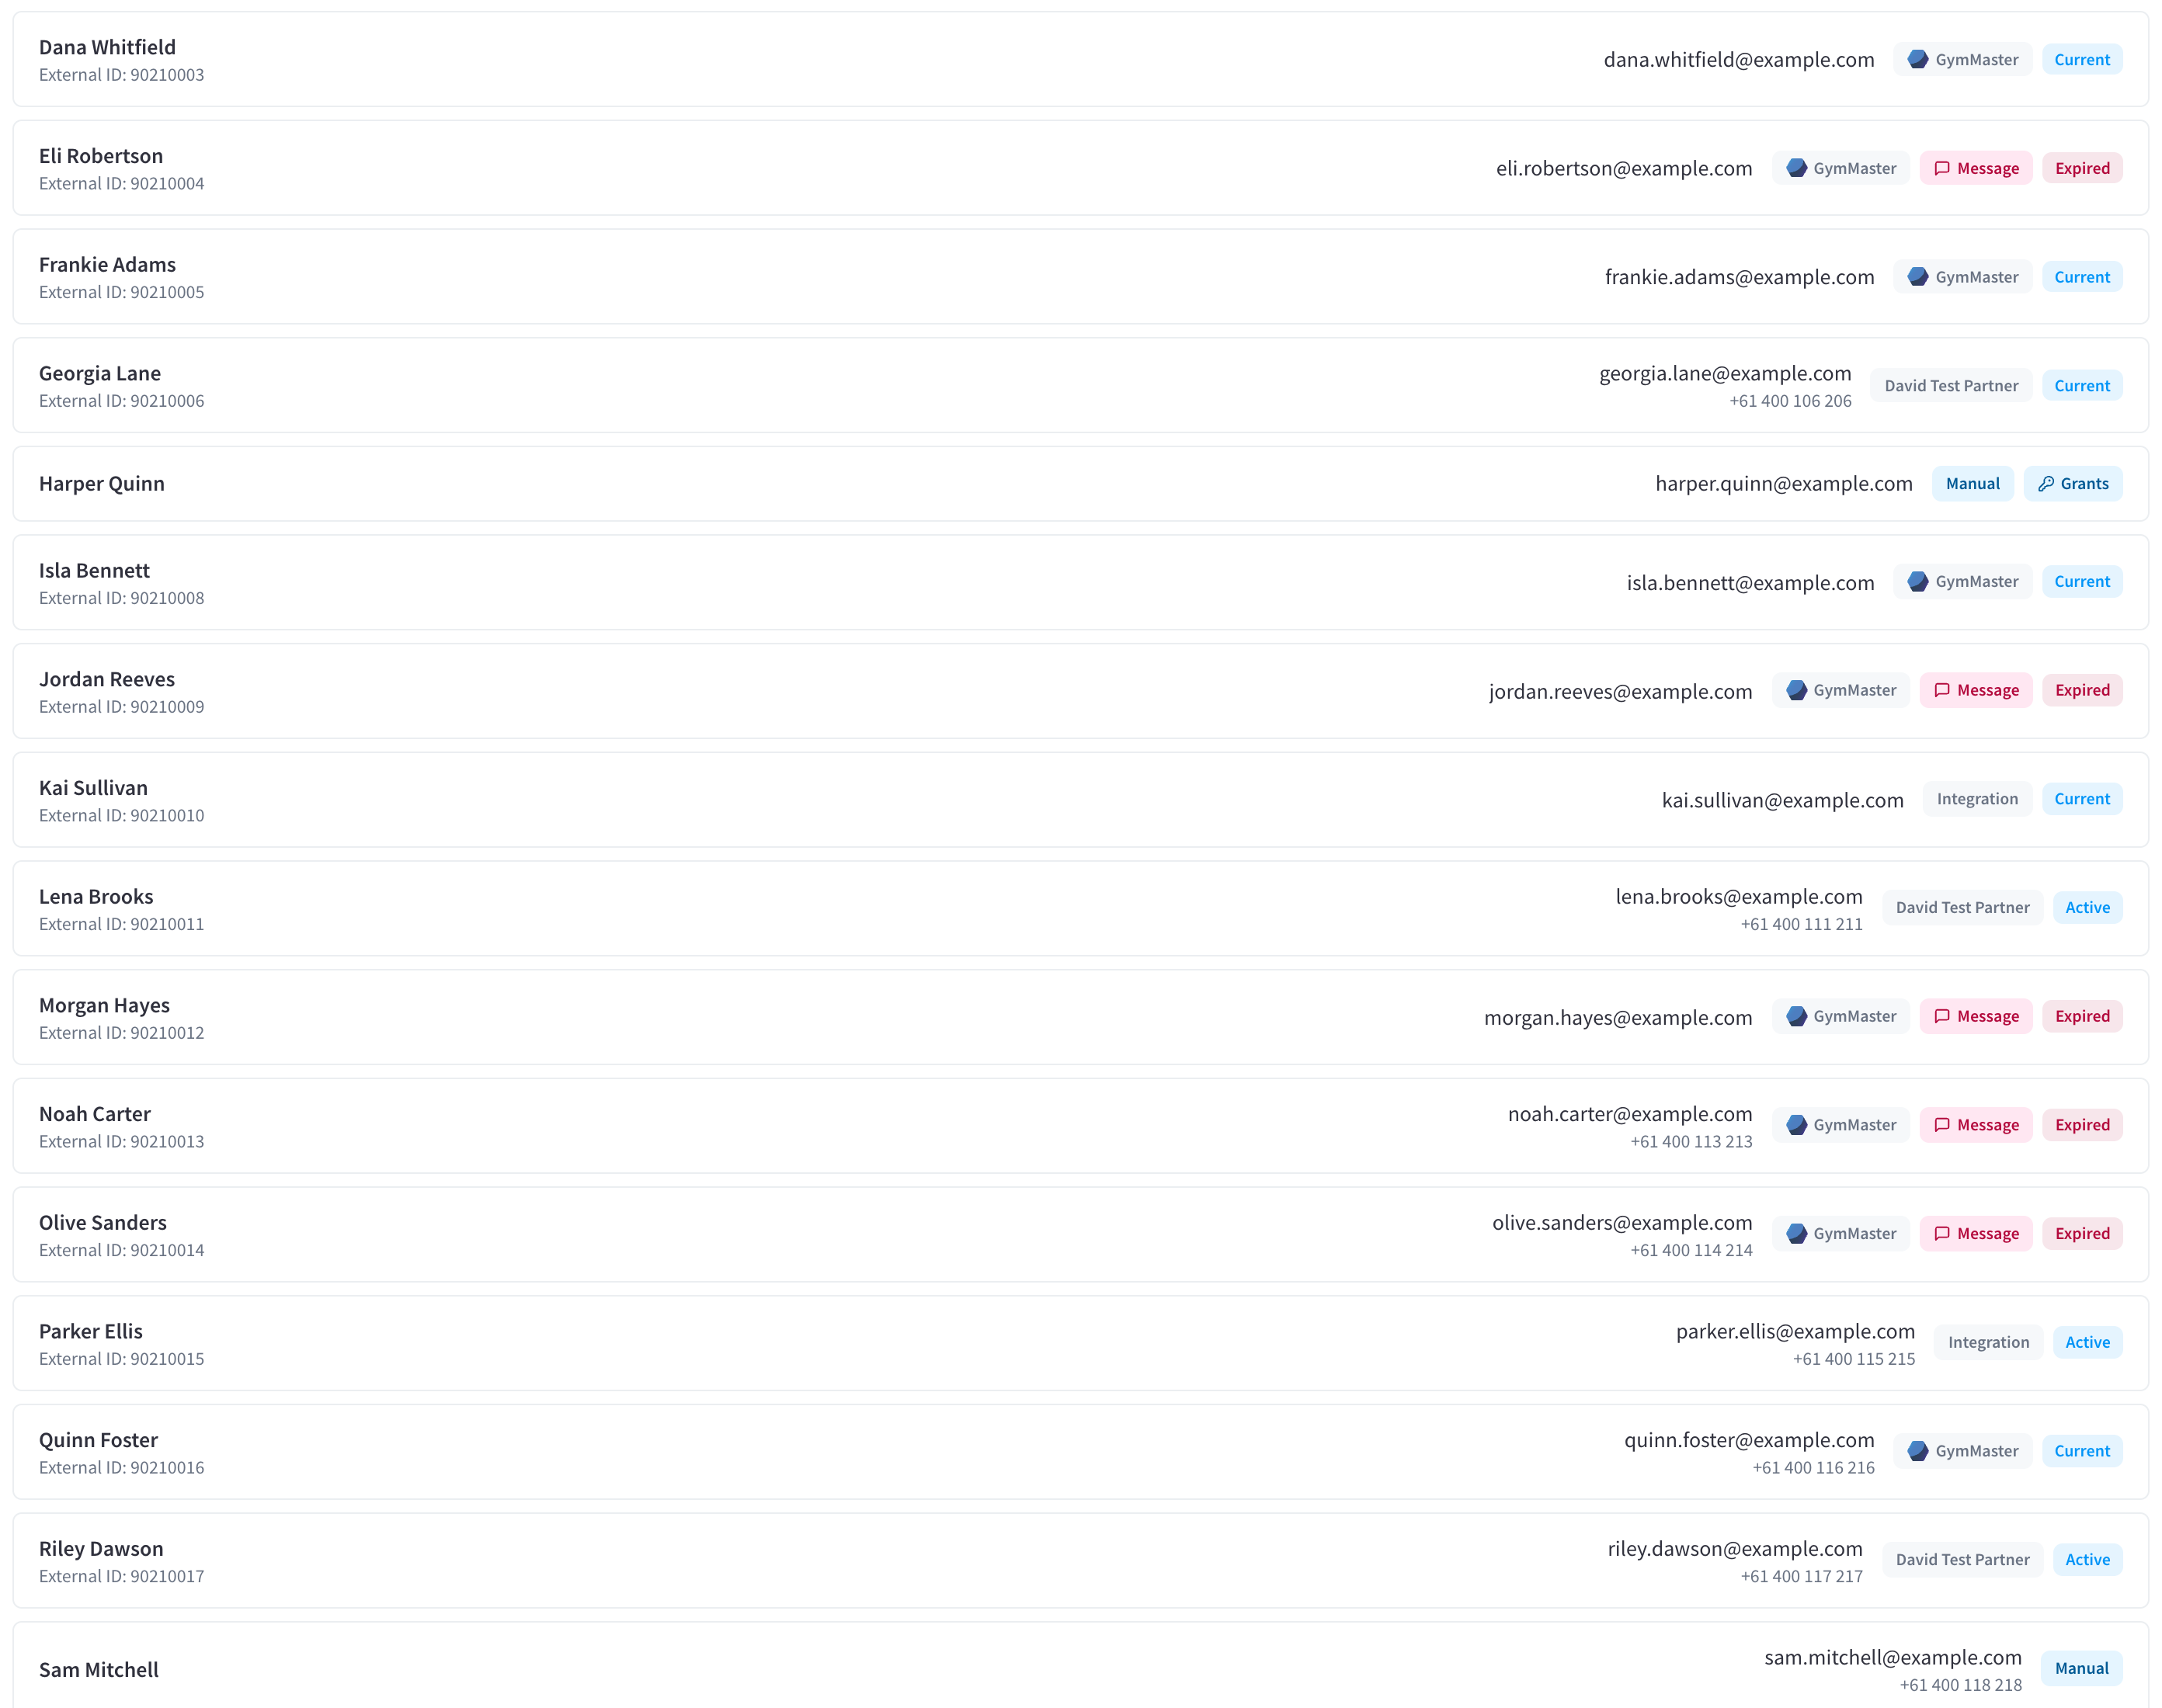
Figure 4: User rows with badges
| Badge | Meaning |
|---|---|
| Manual / Integration / CCTV/Computer Vision (or partner name) | The row's source |
| Message | The user has an active app message (coloured by severity) |
| Disabled | Access enabled is off — the user can't unlock anything; the row is dimmed |
| Grants | The user has per-user grants |
| Invited | An invitation email was sent and the user hasn't used the app yet |
| Membership status (e.g. Current, Expired) | The user's membership status from the source system |
Synced rows also show their External ID or Computer Vision ID under the name.
Adding a user manually
- Click Add user.
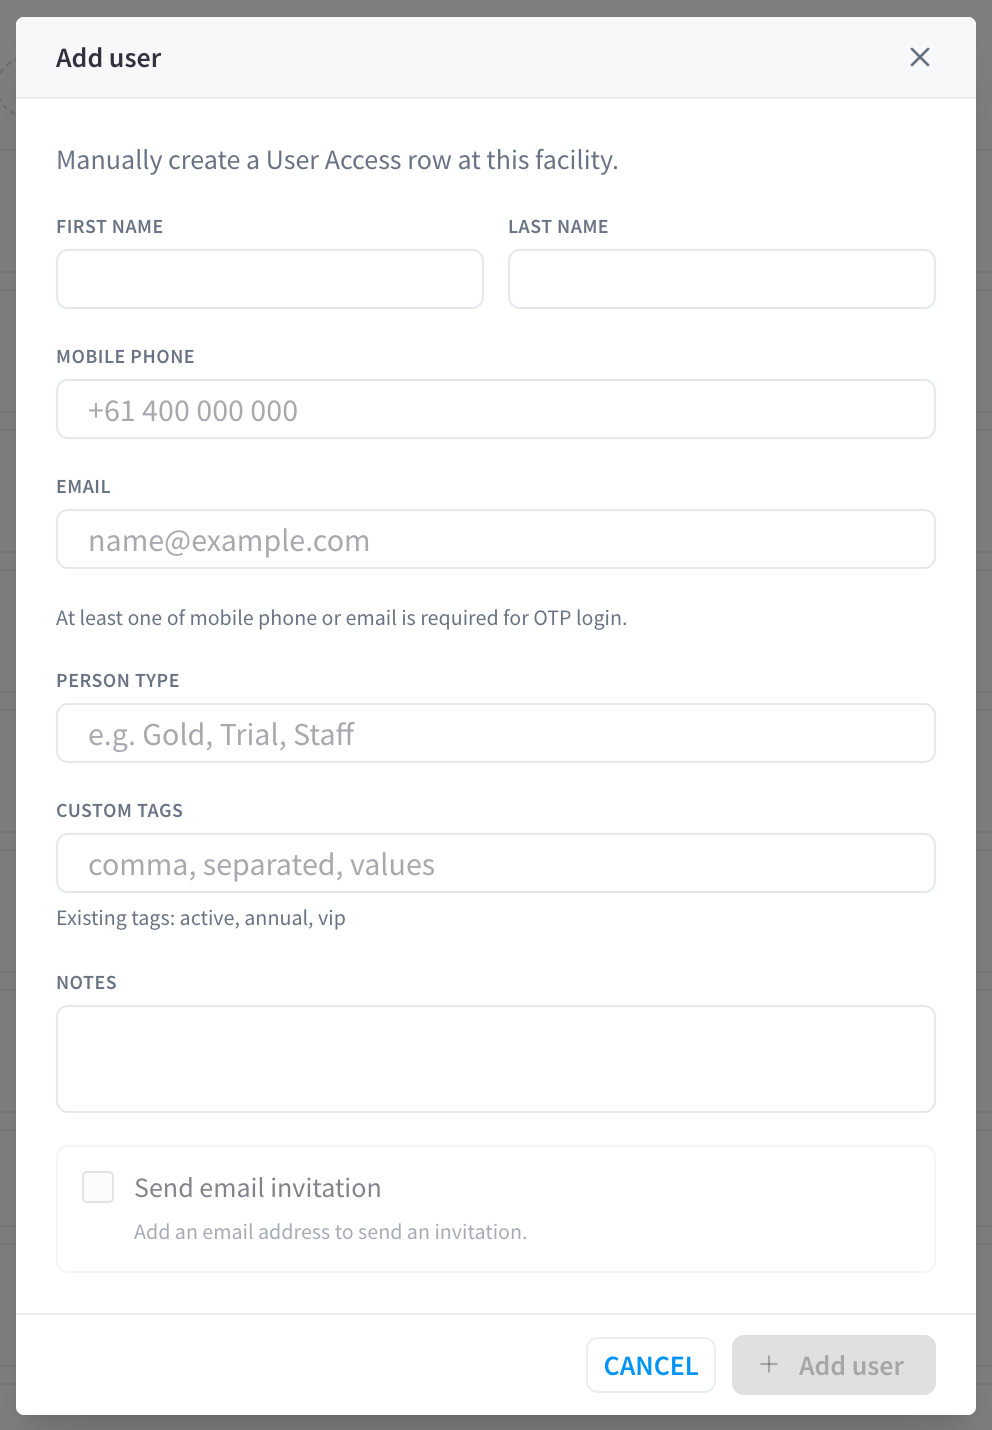
Figure 5: The Add user dialog
- Fill in First name, Last name, and at least one of Mobile phone or Email — "At least one of mobile phone or email is required for OTP login." Phone numbers are normalised to international format.
- Optionally set a Person type (e.g. Gold, Trial, Staff), Custom tags (comma-separated), and Notes.
- Leave Send email invitation ticked to email the person app download links straight away (requires an email address; the checkbox is disabled without one).
- Click Add user.
If a user with the same phone/email already exists at this facility, the dialog tells you and offers Open existing user instead of creating a duplicate.
Adding a user does not by itself let them through any door. They still need to pass an access rule or have a per-user grant (below).
Importing users from CSV
Click Import to bulk-create users from a spreadsheet. Maximum 200 users per import.
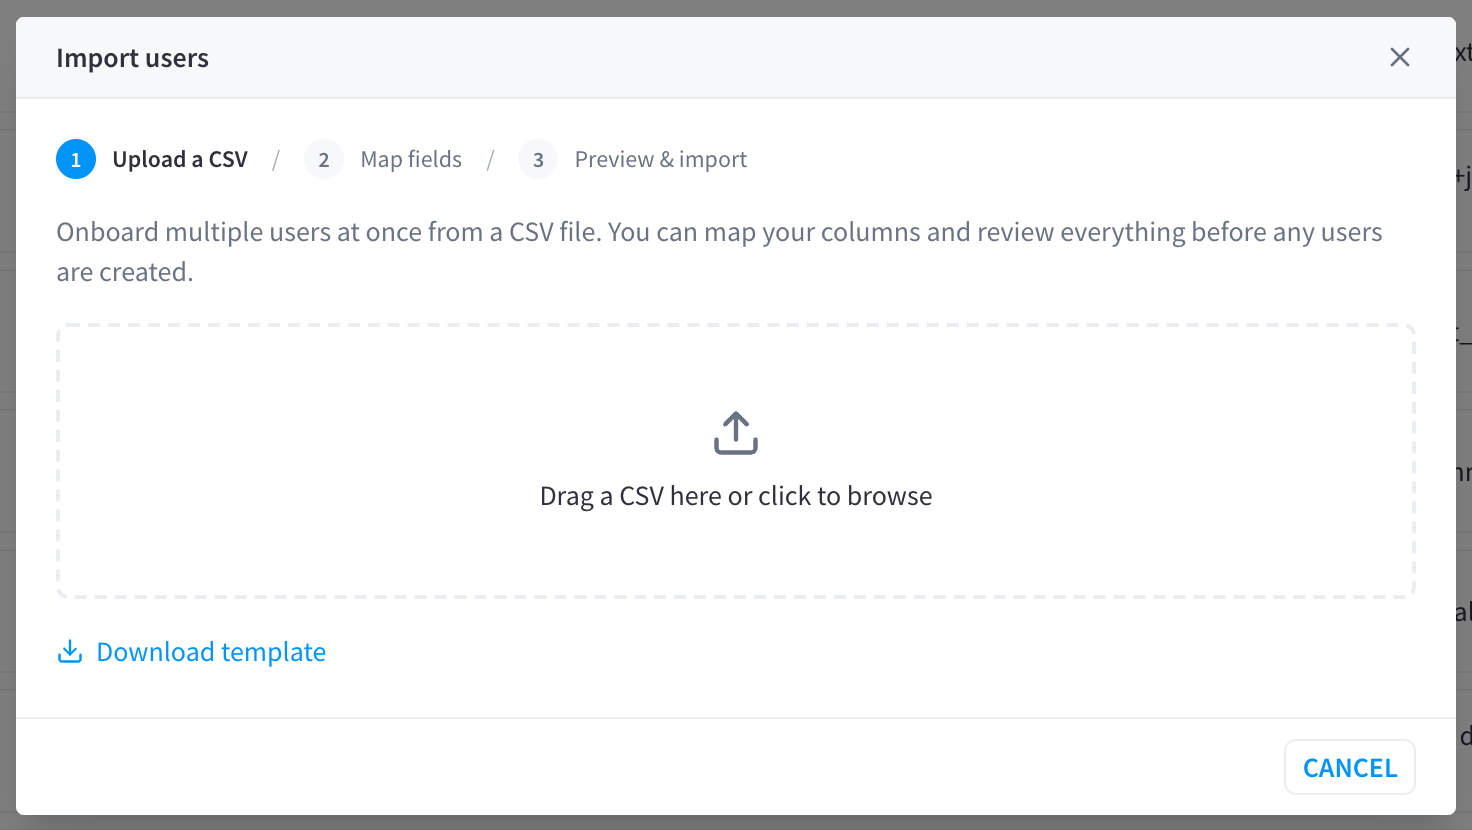
Figure 6: The CSV import wizard
Step 1 — Upload a CSV. Drag a .csv file in or click to browse. Download template gives you a correctly-headed starter file.
Step 2 — Map fields. Each CSV column is mapped to a field: First name, Last name, Mobile phone, Email, Person type, Tags, Notes, Access enabled, Door grants, Scope grants — or Do not import. Common header names (e.g. mobile, phone, groups) are mapped automatically. You must map at least a mobile phone or email column.
- Access enabled accepts
true/yes/enabled/1/on/y/activeandfalse/no/disabled/0/off/n/inactive. - Door grants / Scope grants take door or Access Scope names; unmatched names are flagged in the preview.
Step 3 — Preview & import. Review the first rows, choose whether to Send invitation email to imported users (only users with an email are invited), then click Import. Results show Imported, Skipped (already exist), and Errors counts.
The user detail panel
Click any row to open the user's panel.
Profile and identity
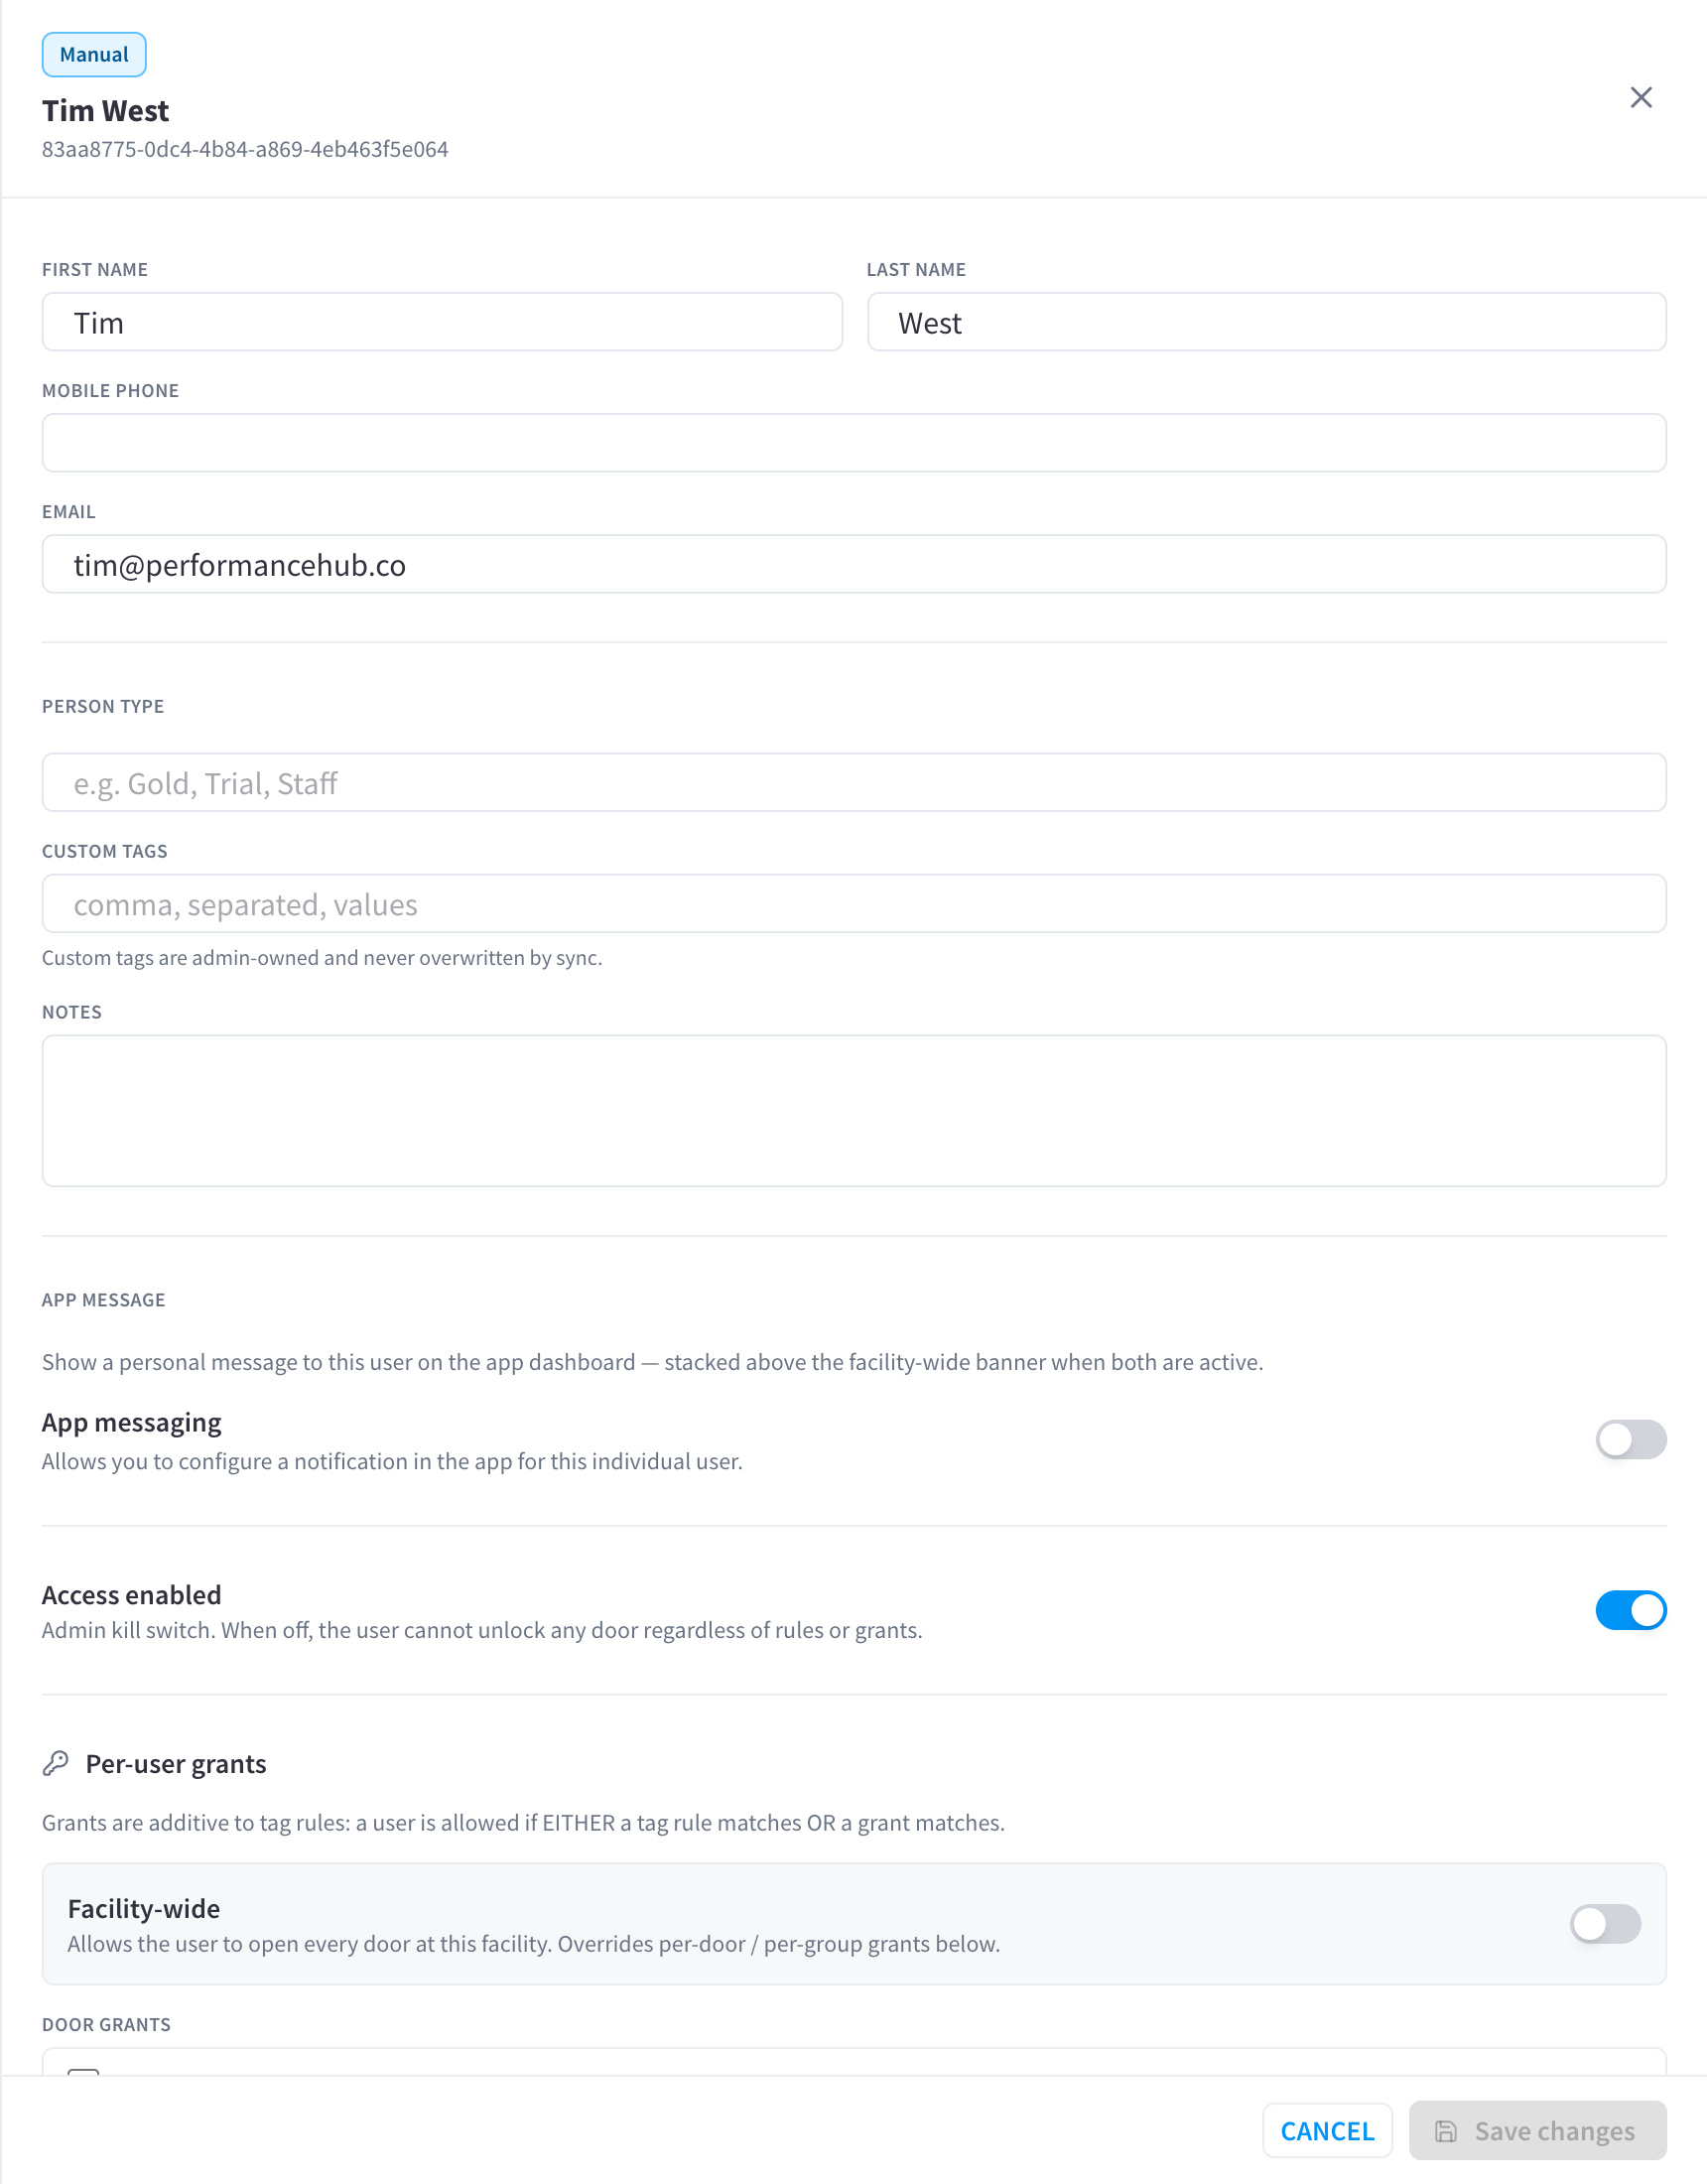
Figure 7: Contact details, person type, tags, and notes
- First name / Last name / Mobile phone / Email — for synced users these are overwritten by each sync pass unless the row is decoupled (below).
- Person type and Membership status — used by person-type access rules.
- Synced tags (read-only, from the source system) and Custom tags (admin-owned, never overwritten by sync). Both kinds satisfy tag-based access rules.
- Notes — free text, up to 2000 characters.
- App message — a personal message shown on this user's app dashboard; see App Messaging.
Access enabled (the kill switch)
The Access enabled toggle instantly blocks or restores all door access for this user. When off:
- Every unlock attempt is denied (reason: access disabled), regardless of rules or grants.
- The row shows a Disabled badge and is dimmed in the list.
Use this to suspend someone immediately without deleting their record or changing policy.
Track source updates (synced users only)
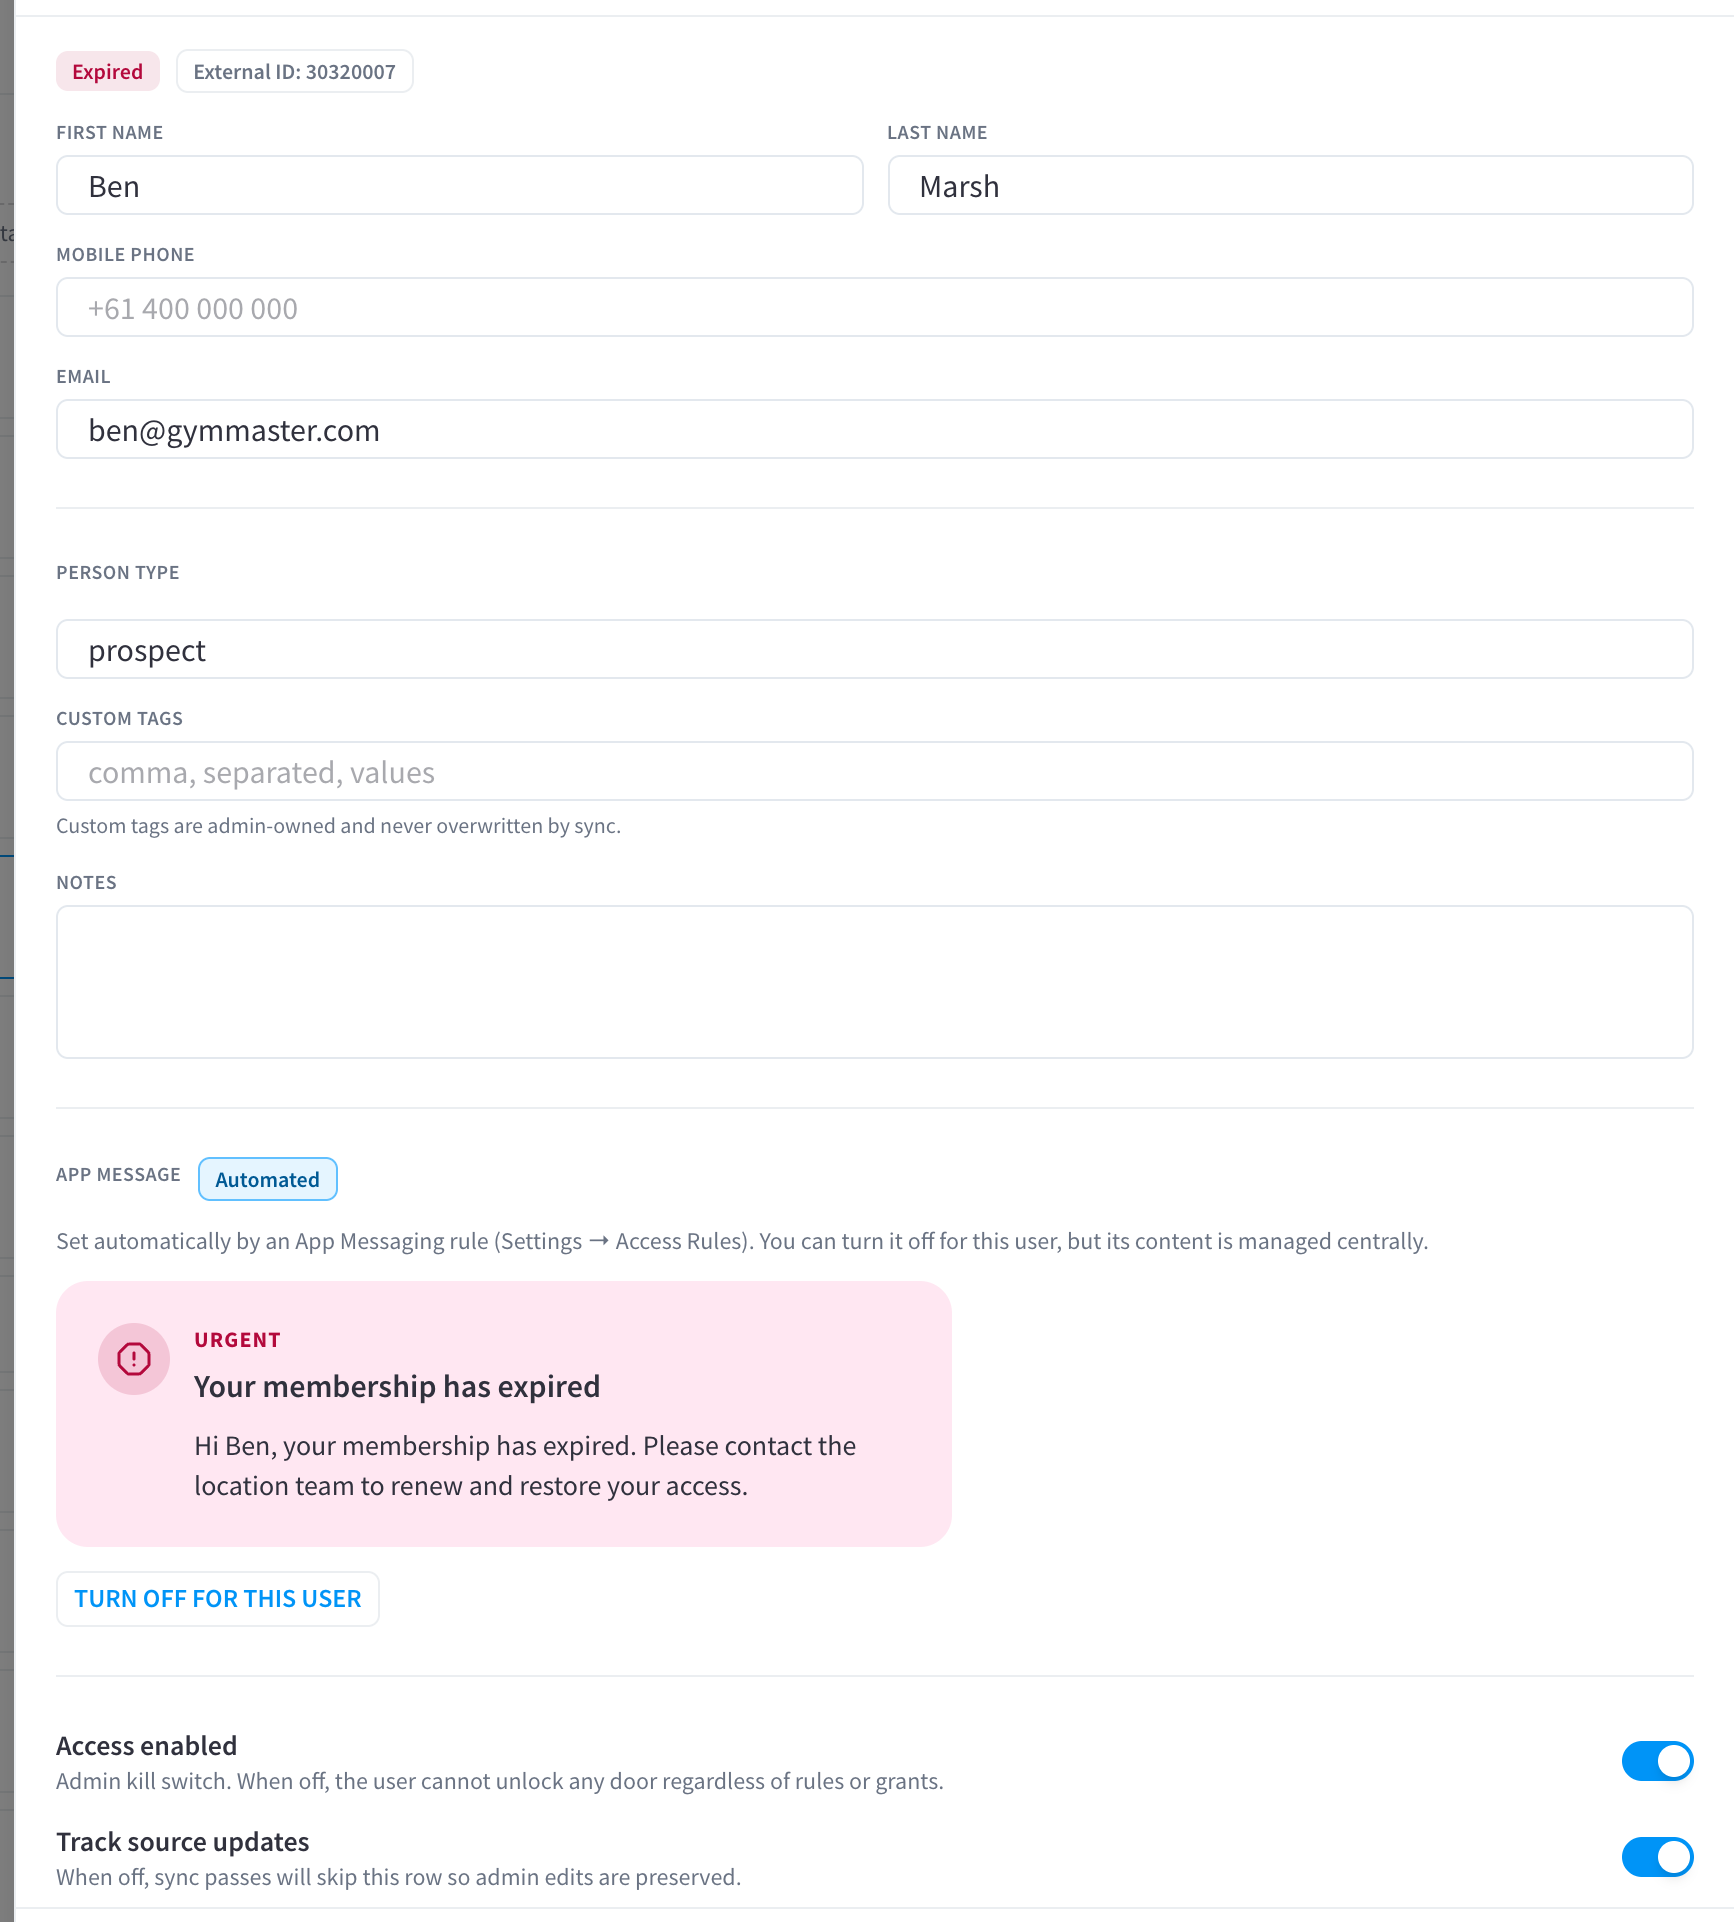
Figure 8: Source tracking for a synced user
For Integration/CCTV users, the Track source updates toggle controls whether sync keeps overwriting the row:
- On (default): name, phone, email, type, status, and synced tags are refreshed on every sync. If the person is removed at the source, their access is disabled automatically.
- Off (decoupled): sync skips this row entirely — your manual edits are preserved, and source removals no longer affect it. The row shows a Decoupled badge. Toggle back on to re-couple.
Panels for synced users also include links to the source record (the Integration record or the Computer Vision person).
Per-user grants
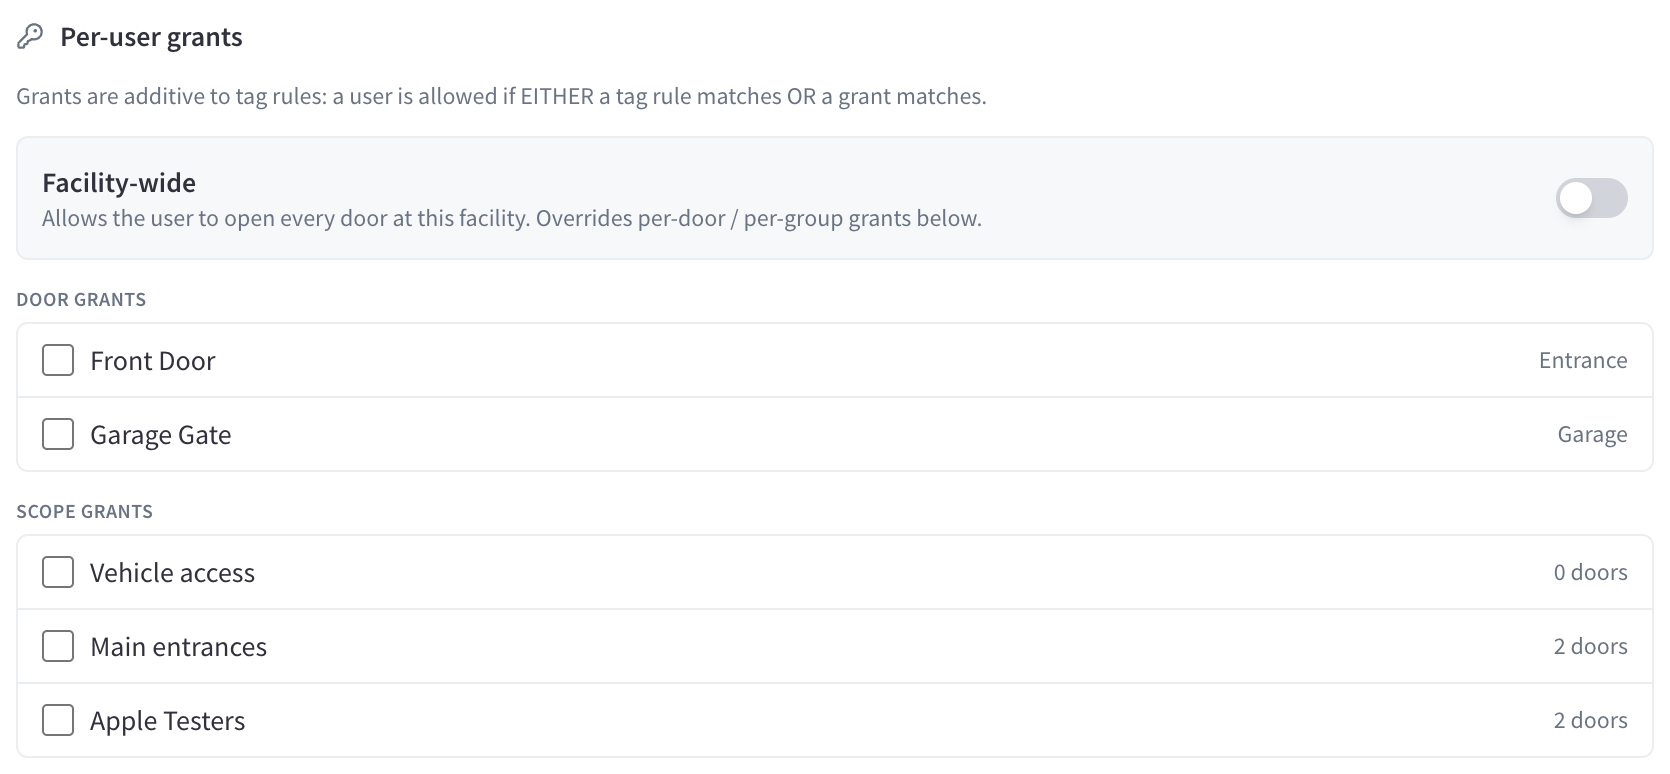
Figure 9: The grants editor
Grants give this specific person access in addition to whatever the facility's access rules allow:
| Grant | Effect |
|---|---|
| Facility-wide | Every door at the facility (overrides the door/scope lists while on) |
| Door grants | Tick individual doors |
| Scope grants | Tick Access Scopes — the user gets every door in the scope, including doors added to the scope later |
Grants can carry their own operating hours, limiting when the grant applies. Clear all removes every grant at once. See How access decisions work for how grants combine with rules.
Invitation
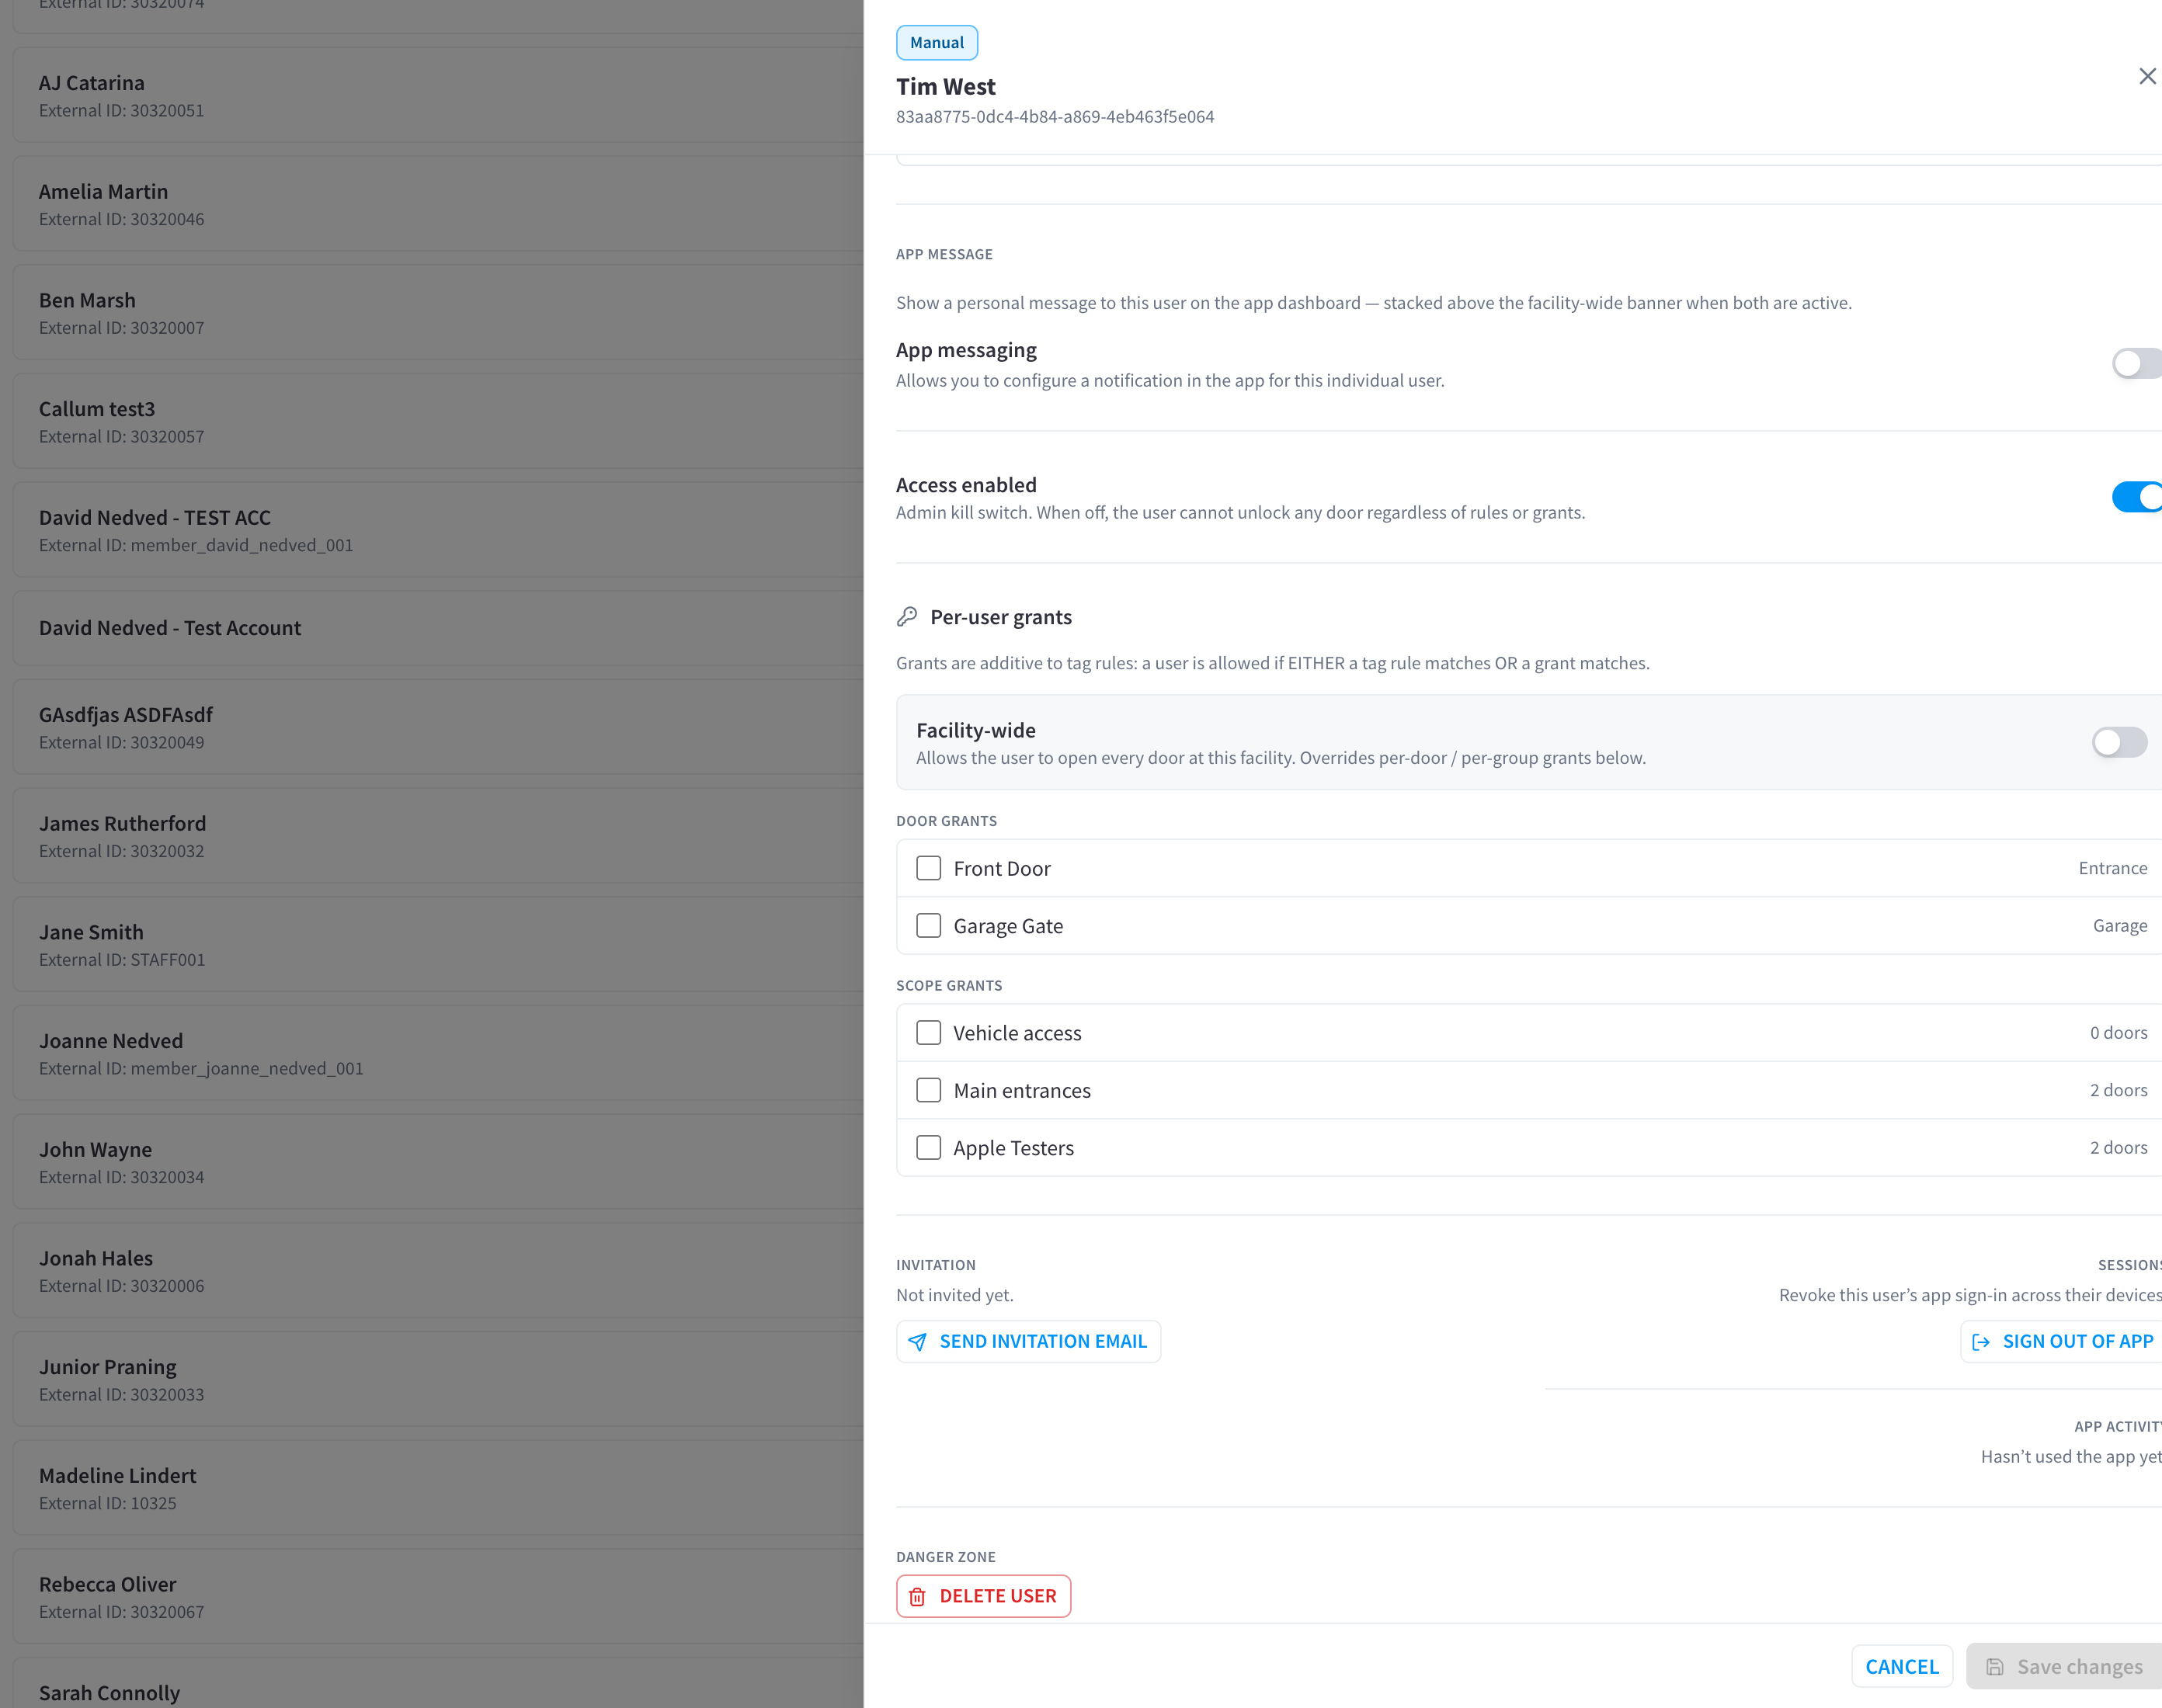
Figure 10: Invitation status and resend
Shows whether an app invitation email has been sent, when, and whether it failed; the button reads Send invitation email or Resend invitation email. Invitations are email-only. Full details in Invitations.
Sessions and app activity
- App activity — Last used the app with a timestamp (or "Hasn't used the app yet.") and recent IP addresses.
- Sign out of app — revokes the user's app session: "This revokes the user's app session. They'll need to sign in again to unlock doors." Note: "Sessions are revoked immediately, but if the user is currently signed in it may take up to 15 minutes before they're fully signed out of the app." Because sessions are keyed by phone/email, a person using the same phone/email at another facility is signed out there too.
Deleting a user
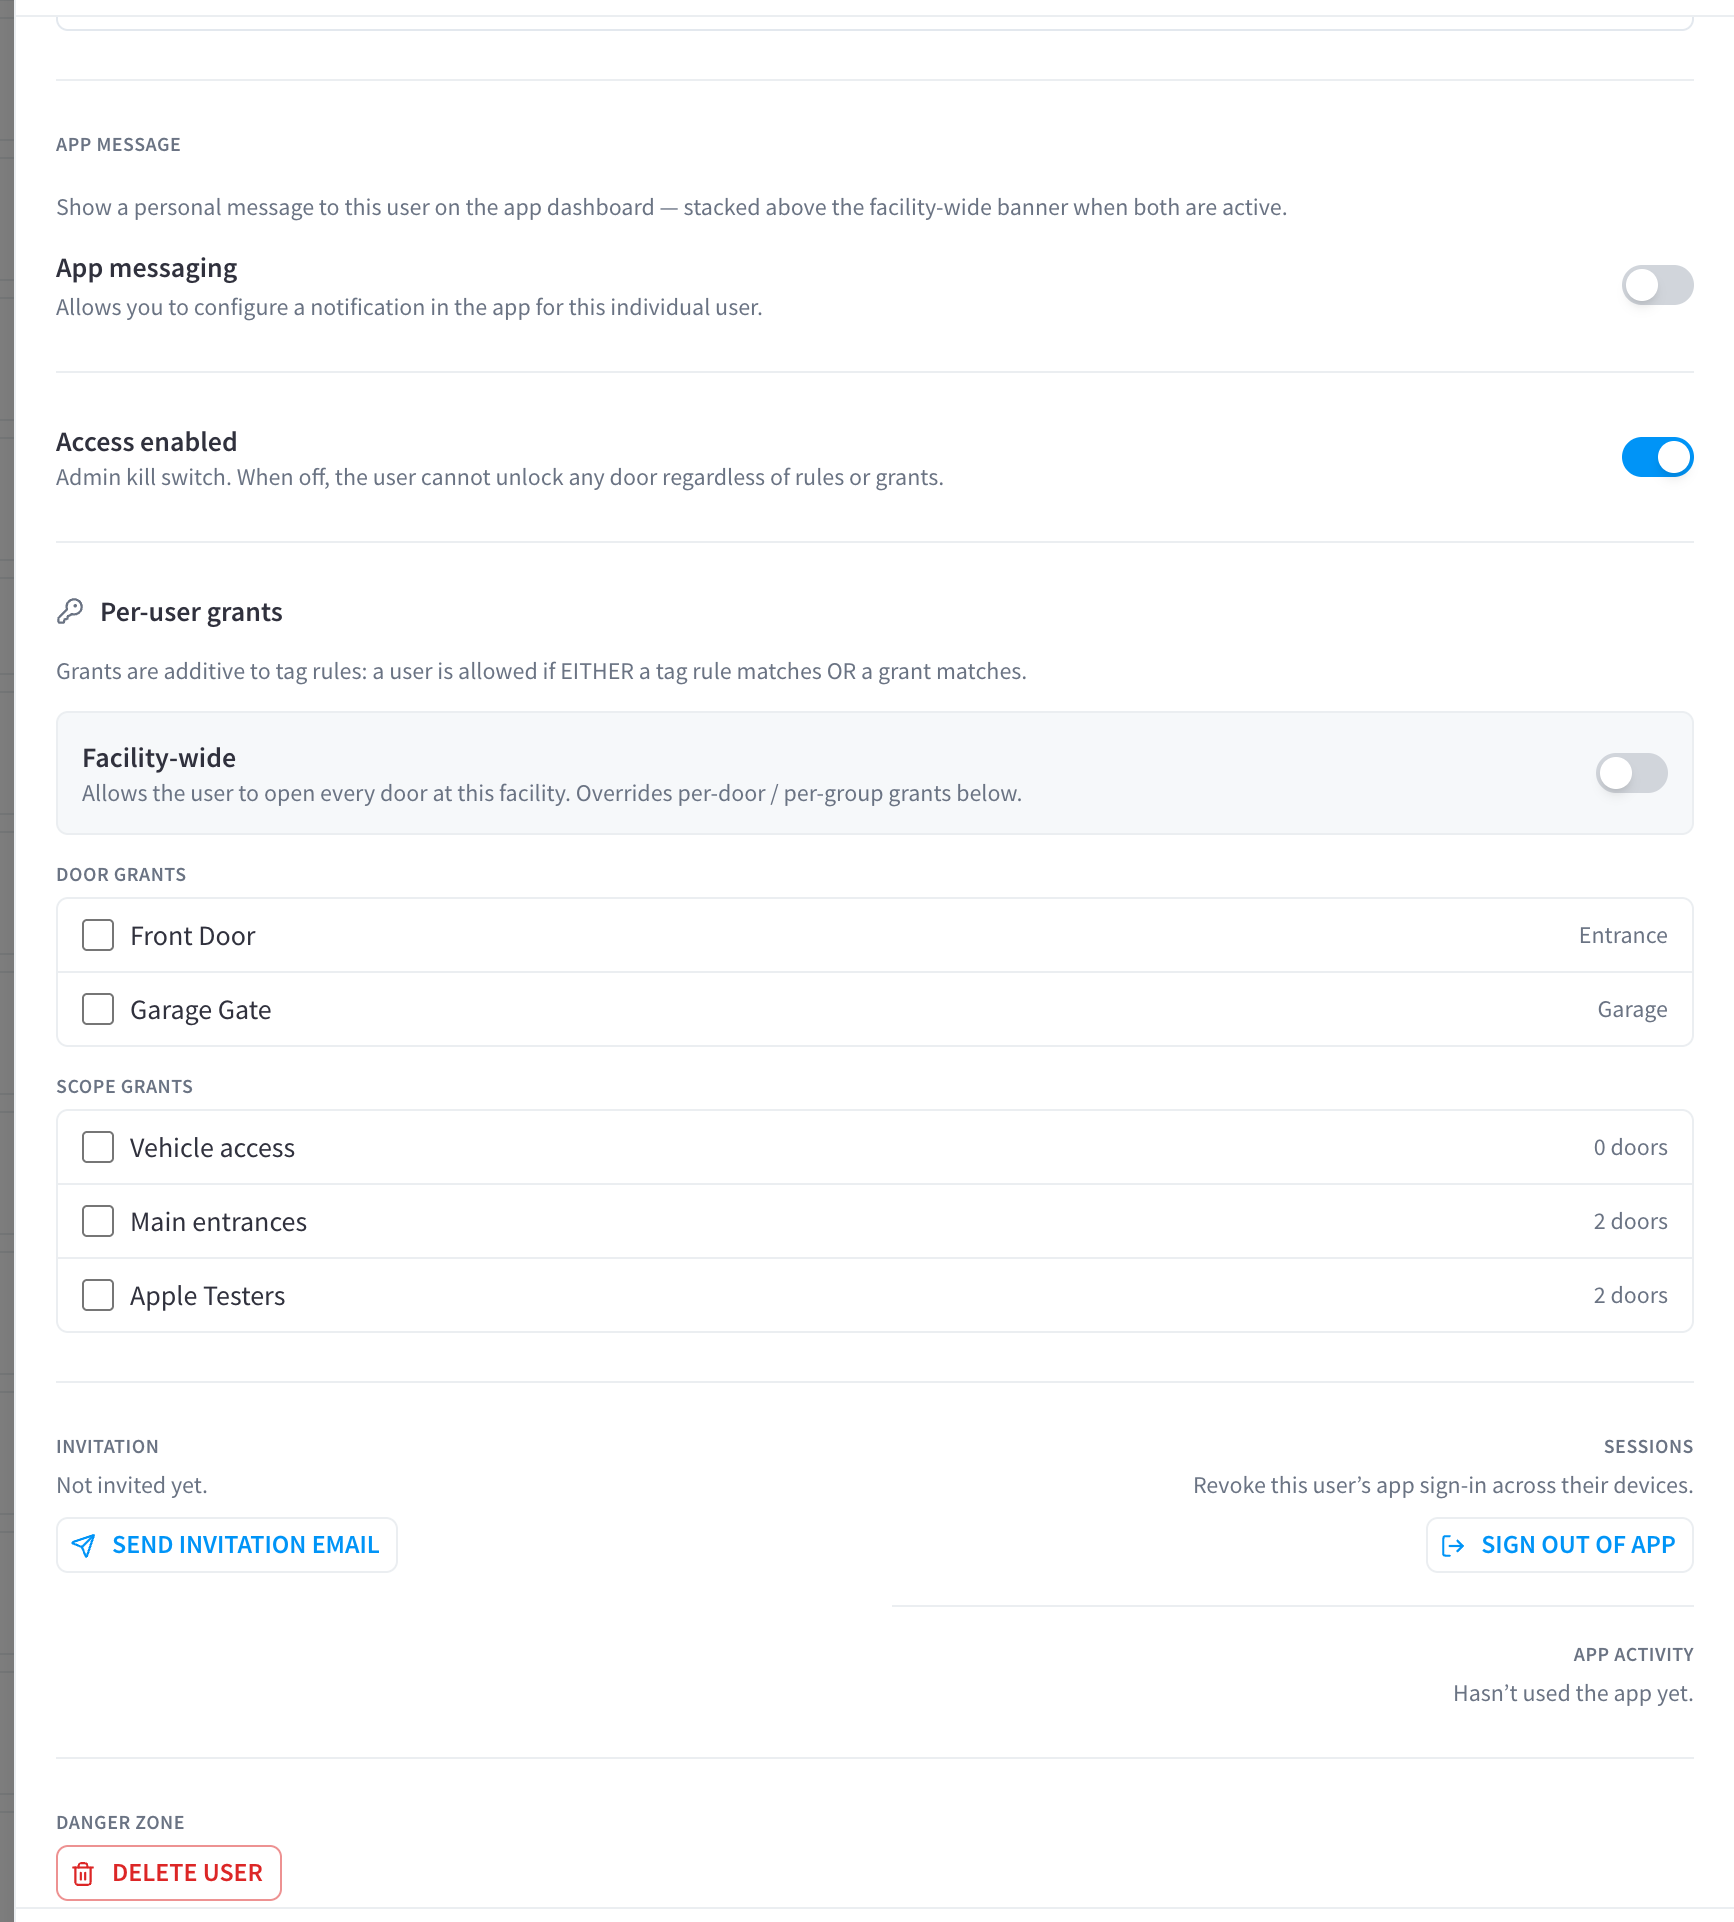
Figure 11: The danger zone
Delete user removes the row from User Access. "Their access log history is kept for the audit trail." Deleting also disables their access immediately. For synced users, note that the person can reappear on the next sync unless you also disable the integration or decouple — to clear out whole integrations, use Bulk delete synced users in Sync & Integrations.