
Restore & Recovery
Backups capture your agent's state every hour. This page covers the other half: getting things back — from recovering one accidentally-deleted file, to rolling the whole agent back to yesterday, to standing up a brand-new device with everything a failed one had.
Everything here starts from the Backups tab of the device drawer.
Quick reference
| I want to… | Use |
|---|---|
| Get one file back | Browse files on a restore point → download or restore the file |
| See how a file changed over time | Version history on the file |
| See what changed between backups | What changed on a restore point |
| Roll the whole agent back | Restore → Everything (full restore) |
| Roll back just files or the wiki | Restore → Workspace files or Wiki |
| Undo a restore I just did | Undo restore on the completed restore |
| Swap failed hardware | Replace this device (Configuration tab) |
| Retire a device | Remove & reset device (Configuration tab) |
A reassuring property of the design: every full restore automatically takes a safety backup first, so restoring is never a one-way door — you can always undo back to the moment before.
Browsing inside a restore point
Click Browse files on any restore point to open the backup file browser — a read-only view of the agent's files exactly as they were at that moment.
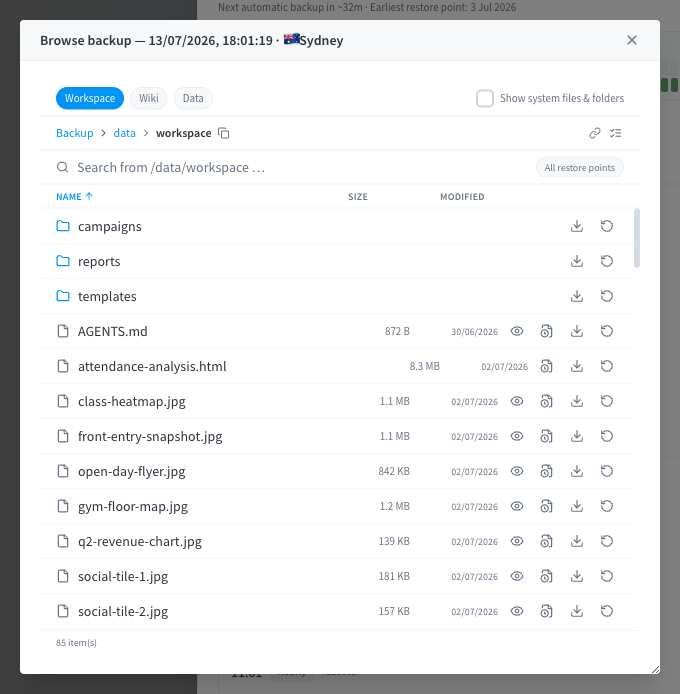
Figure 1: Browsing the files inside a restore point
From the browser you can:
- Navigate folders — the agent's workspace, wiki, and configuration areas.
- Search for files by name across the whole restore point, or search inside file contents.
- Download individual files (up to 2 GB per file) straight to your computer — handy when you just need to look at an old version without restoring anything.
- Restore selected files back onto the device, in place.
Browsing works even when the device is offline or dead — the backups live in the cloud, so a failed device doesn't stop you reading (or downloading) everything it had. This is also how you'd extract data before a replacement.
Version history for a single file
For any file in the browser, Version history shows every restore point in which that file changed — with timestamps and sizes — so you can walk a document back through time and pick the exact version you want.
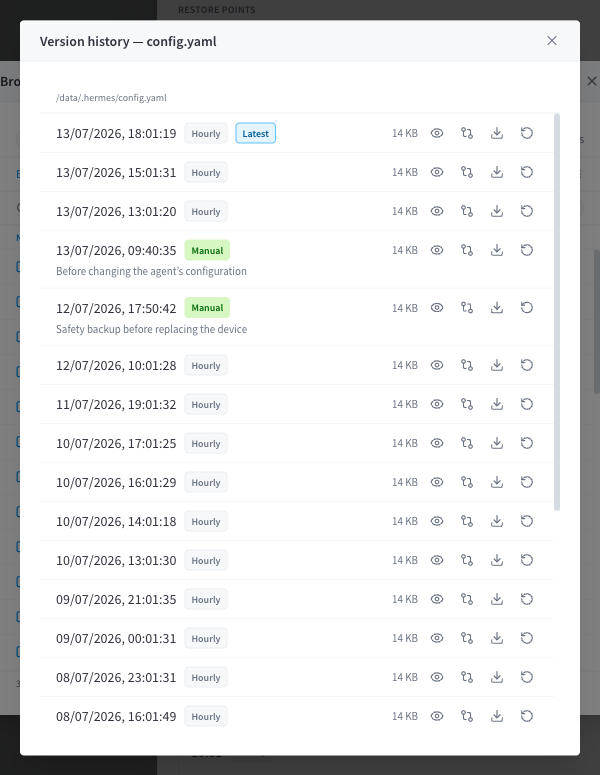
Figure 2: Version history for a single file across restore points
What changed between restore points
What changed compares a restore point with the one before it and lists files that were added, modified, or removed.
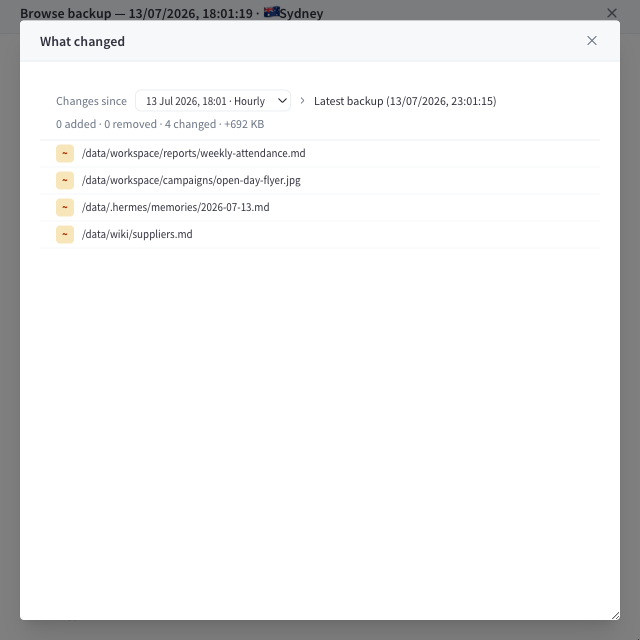
Figure 3: The change list between two restore points
Use it to answer "when did this file disappear?" or to sanity-check what a restore would roll back. (Comparisons work between restore points stored in the same region.)
Restoring
Click Restore on a restore point to open the restore dialog.
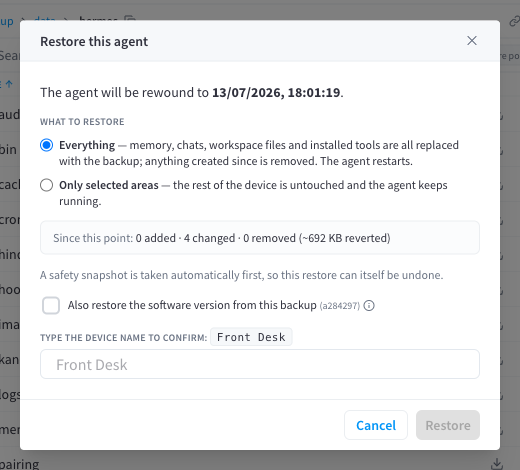
Figure 4: The restore dialog — choose everything, or a specific area
Everything (full restore)
Rolls the entire agent back to the restore point: conversations, memory, files, wiki, personality, skills, automations — all of it.
- You must type the device name to confirm — full restore replaces the agent's current state.
- A safety backup is taken automatically first (it appears in the list as a pre-restore point).
- The agent stops briefly while data is replaced, then comes back at the restored state. Anything created after the restore point is replaced — but recoverable via Undo restore.
- Optionally, the restore can also return the device to the software version that was current when the backup was taken, so agent state and software move back together.
Selected areas
For a lighter touch, restore just:
- Workspace files — the agent's file area only, or
- Wiki — the agent's structured notes only.
Selective restores don't stop the agent and don't need the typed confirmation — memory, conversations, and settings are untouched.
Individual files
From the file browser (above), restore any selection of specific files back into place — the most surgical option, for when one document went wrong.
Undo restore
After a full restore completes, the restore entry offers Undo restore — one click returns the agent to the automatic safety backup, i.e. the exact state from just before you restored. If a restore turns out to be the wrong call, nothing is lost.
Replacing a device
If hardware fails, Replace this device (bottom of the Configuration tab) moves everything to a new unit.
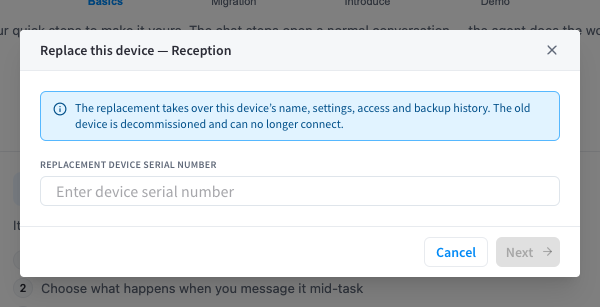
Figure 5: Replace this device — enter the new unit's serial and choose a restore point
How it works:
- Power up the new device and get it online (it must be at the same facility, unpaired, and reachable — the dialog checks).
- Enter the new unit's serial number — from its QR sticker or the label on the bottom/back of the unit.
- Choose the restore point to seed it from — by default, the newest healthy backup of the old device.
- Type the old device's name to confirm.
The new device takes over the old one's name, location, access settings, Performance Hub connection, and backup configuration, then restores the chosen backup onto itself. The old device's registration is retired, and its backup history remains linked so nothing is orphaned. You'll get a notification when the replacement restore completes (or if it fails).
Because backups run hourly, a hardware failure typically costs at most an hour of agent state.
Removing a device
Remove & reset device (bottom of the Configuration tab) retires a device from your facility.
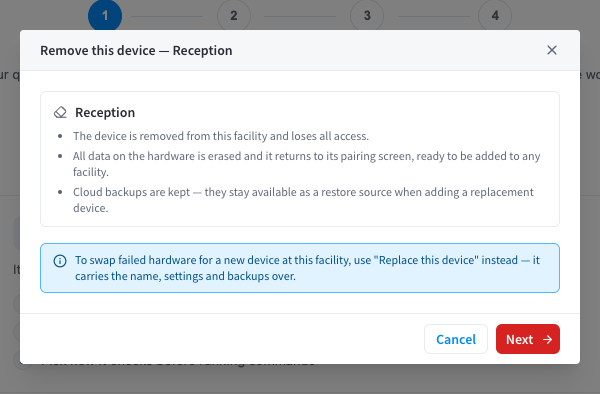
Figure 6: Remove & reset — what will happen, and what is kept
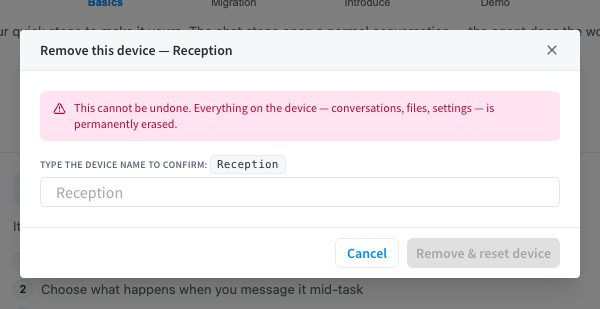
Figure 7: Typed-name confirmation before removal
What happens:
- The device is factory reset — all data on the physical unit is erased and it returns to its out-of-box pairing screen, ready to be paired again (here or elsewhere).
- Its credentials — Performance Hub connection, model access, notification keys — are revoked immediately.
- You must type the device name to confirm.
What's kept:
- Cloud backups survive removal. The device's restore points remain in cloud storage under your facility, and can seed a future device — either through Replace this device or through Start from a backup in the pairing dialog's advanced options. They age out under your retention setting as usual.
Removal is the right path when retiring hardware, returning a unit, or decommissioning an agent you no longer need. If you're moving the agent to different hardware, use Replace instead — it's the same outcome with the restore wired up for you.
Related pages
- Backups — cadence, retention, pinning, and regions
- Getting started — pairing, including Start from a backup
- Device management — the Configuration tab
- Troubleshooting