Timeline
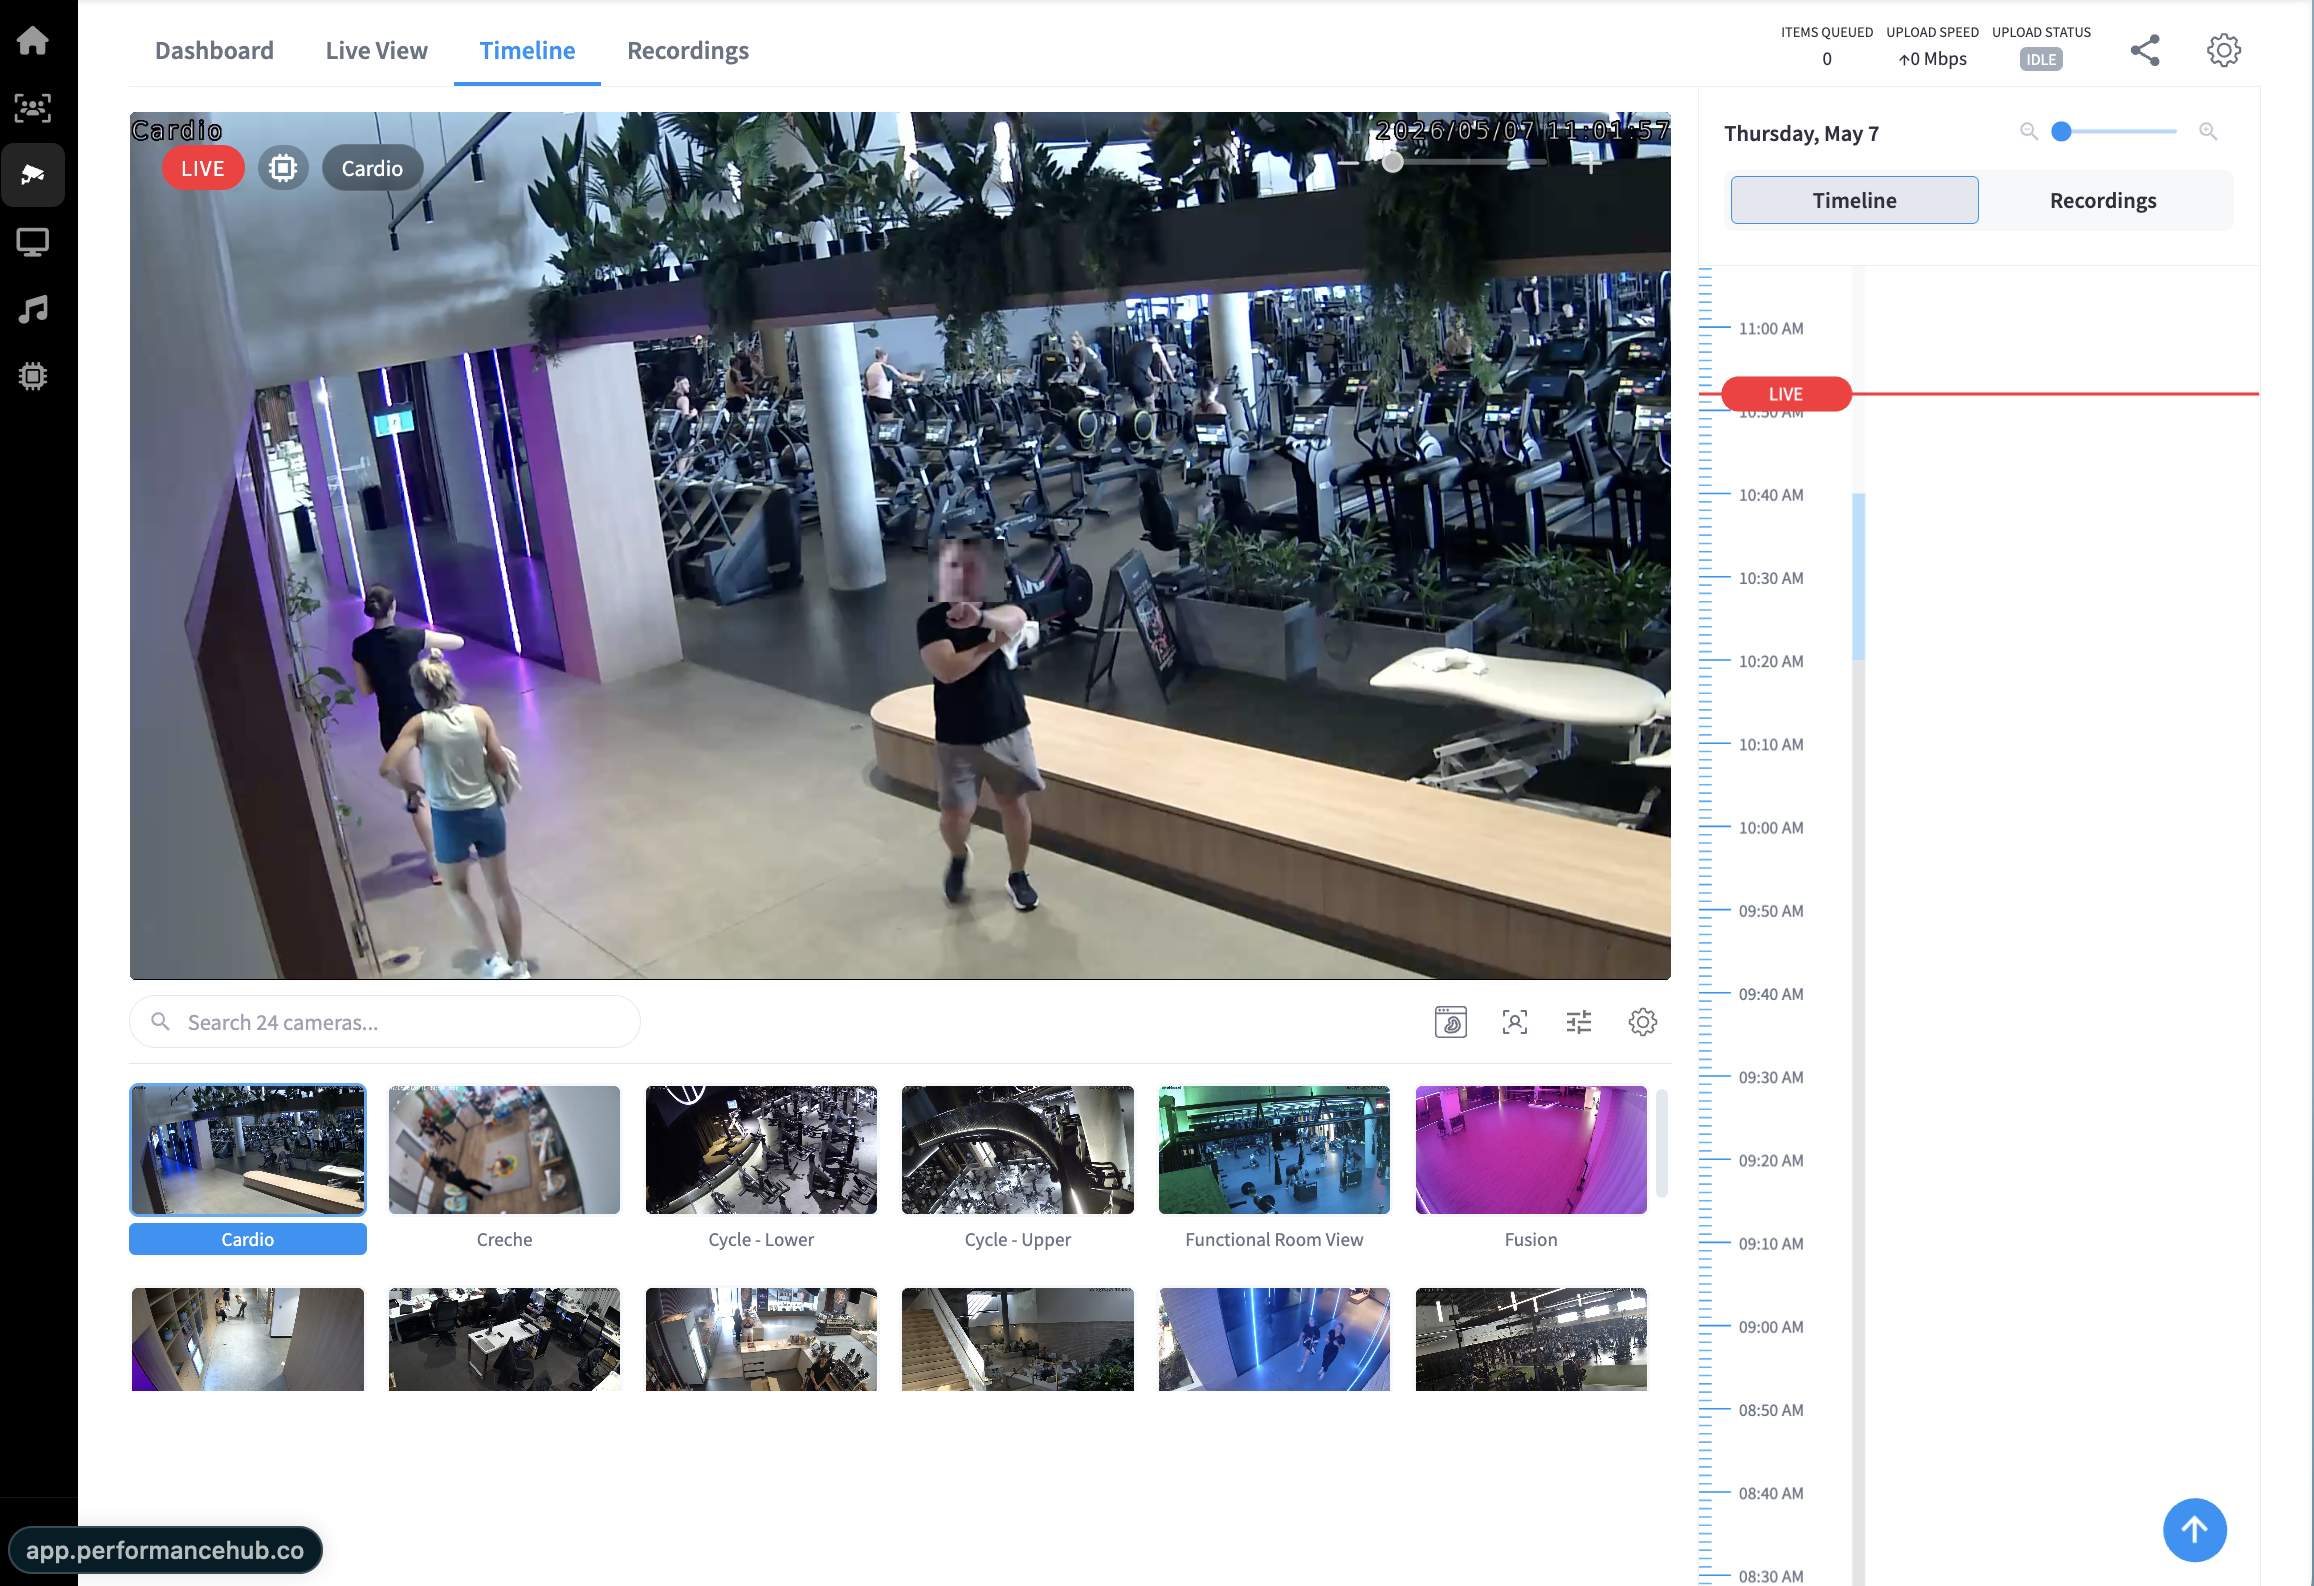
The Timeline tab lets you scrub through recorded footage for any camera at your facility. Select a camera, pick a point on the time ruler, and the video player jumps to that moment. You can also watch the live feed from within this view.
Layout overview
The Timeline view is divided into three areas:
- Video player — the large central area showing the selected camera's feed
- Camera strip — a scrollable grid of camera thumbnails at the bottom, used to switch cameras
- Time ruler — a vertical timeline panel on the right for navigating to a specific time
Video player
The main video player displays the live or recorded feed of the currently selected camera. When viewing live footage, a red LIVE badge appears in the top-left corner of the player, along with the camera name and a timestamp overlay.
Top bar
These metrics refer to the status of the camera itself. Whether the camera has video feed queued for upload, the speed at which said queued items are uploading, and the status of any pending uploads. Share and settings of the CCTV are also available.

| Element | Description |
|---|---|
| Items Queued | Number of video clips currently queued for processing or upload |
| Upload Speed | Current upload throughput in Mbps |
| Upload Status | Toggle indicator showing whether uploads are active or paused |
| Share | Share a link to the current view or clip |
| Settings | Access CCTV-specific settings |
Camera strip
The camera strip below the video player shows thumbnail previews for all connected cameras at the facility. The currently selected camera is highlighted with a label beneath its thumbnail.
Use the "Search cameras..." field to filter by camera name. The strip scrolls horizontally to show all cameras.
Camera strip controls
| Icon | Function |
|---|---|
| Grid icon | Switch between thumbnail layout options |
| Multi-camera icon | Toggle multi-camera view |
| Filter icon | Filter the camera list |
| Settings icon | Selected Camera settings |
Click any thumbnail to load that camera's feed in the video player and update the time ruler to show its recording history.
Camera Settings further detail
Under the settings cog icon you will find:
Details
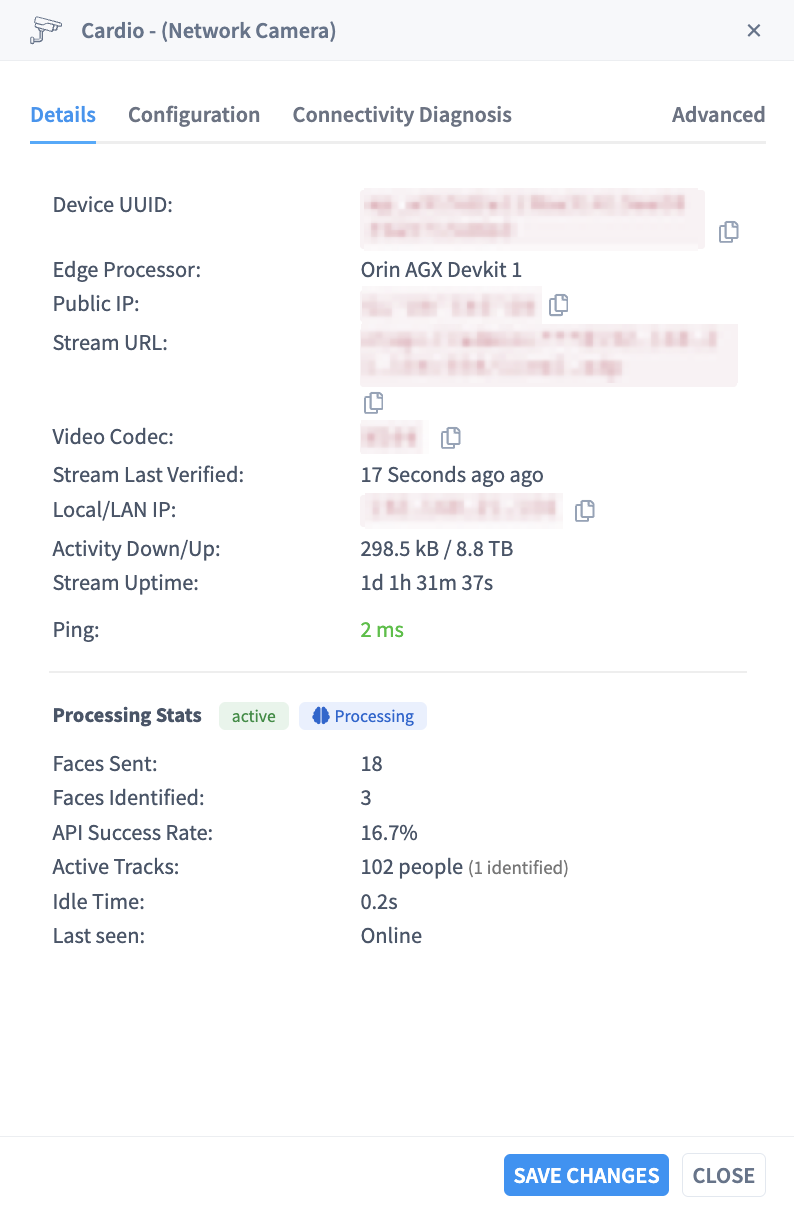 Technical details, such as the device unique identifier (UUID) which may be required during troubleshooting, whether the camera is managed by an Edge Processor, the Public IP address, the CCTV camera stream URL, Video Codec type, how long ago the stream was verified, the Local/LAN IP, Activity Down & Up time, stream Uptime, Ping stats, and Processing stats around biometrics (further details in AI Insights & People).
Configuration
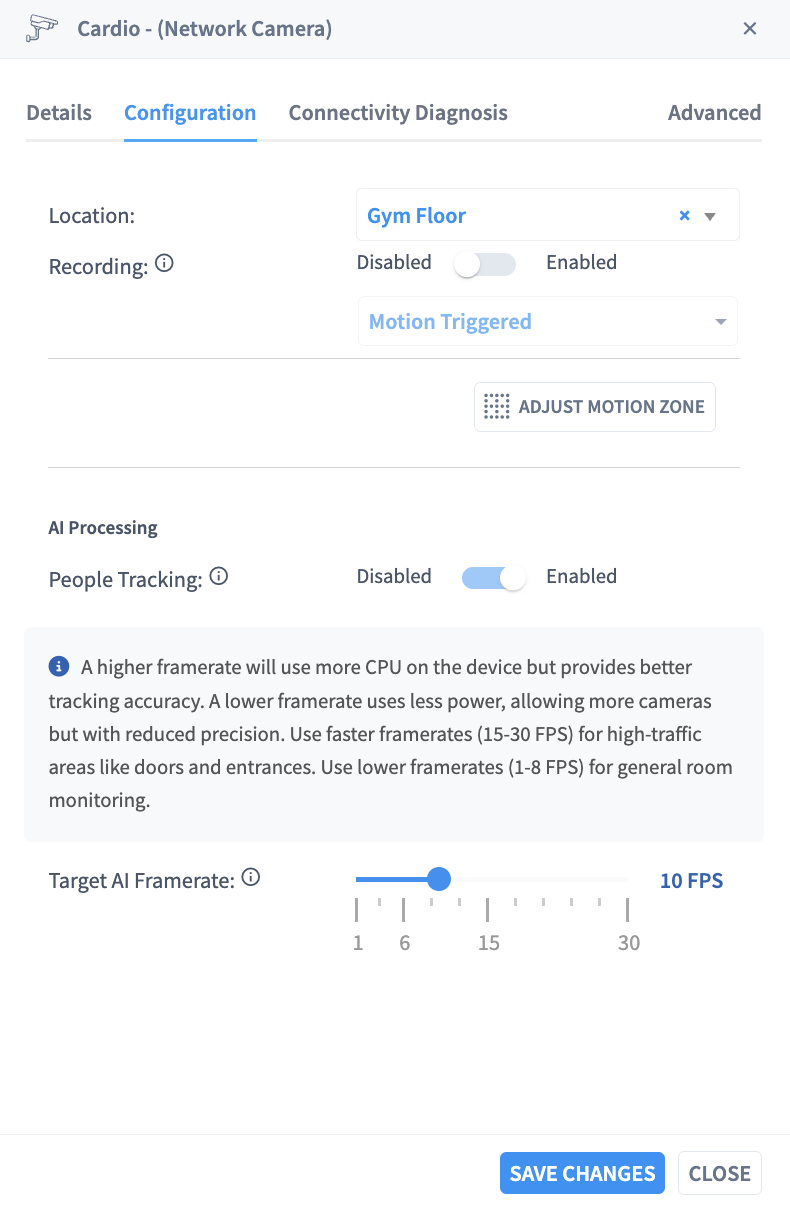 Importantly, the configuration tab of the camera settings contains the camera location, whether the camera recording is disabled or enabled, and whether the camera is set to be motion triggered. Motion trigger zones can be further configured under the "Adjust Motion Zone" button directly under the Motion Trigger drop down. Within this feature you can select Motion Detection Zones.
- How to use Motion Detection Zones:
-
- Click a zone to select it
-
- Drag zones to move them
-
- Drag corner points to resize
-
- Click midpoints to add points
-
- Double-click points to remove
Connectivity Diagnosis
Allows network troubleshooting (used for tech support staff).
Advanced
Here the removal of the selected camera can be requested.
Time ruler
The time ruler on the right side of the screen lets you navigate through recordings for the selected camera.
| Element | Description |
|---|---|
| Date | Shows the currently selected date (e.g. Thursday, May 7) |
| Zoom slider | Adjust the time scale of the ruler (zoom in or out) |
| Timeline / Recordings toggle | Switch between the visual timeline scrubber and a list of recordings |
| Time markers | Time labels in 10-minute increments along the vertical ruler |
| LIVE indicator | A red LIVE marker on the ruler showing the current real-time position |
To jump to a specific time, click on the corresponding point on the time ruler. The video player will seek to that moment in the recording.
Note: Only time periods with available recordings are navigable. Gaps in the timeline indicate periods where recording was not active for that camera.
Switching between Timeline and Recordings
Use the Timeline | Recordings toggle at the top of the right panel to switch views:
- Timeline — shows the visual time ruler for scrubbing through footage
- Recordings — shows a list of individual recording clips for the selected camera
Related pages
- CCTV Index — dashboard overview and storage summary
- Live View — watch live camera feeds without timeline scrubbing
- Recordings — manage and review stored recordings